Mr. Man did not like the two stage trigger in his AR-10, chambered in .308 Winchester. He is used to the feel, and break of a classic bolt action trigger (as am I), and wanted an AR trigger that more closely mimicked that feel, and style. My “go-to” trigger for this situation is a single stage HYPERFIRE trigger (which I would highly recommend). However, the Fulton Armory upper and lower receiver that was used on this AR-10 build had a problem with the bolt carrier group (BGC) dragging on the hammer (a/k/a hammer drag). I tried to remedy it, but decided to go with a different trigger system for this build.
The milspec GI trigger worked flawlessly with no hammer drag, so as long as the single stage trigger I picked was milspec, then we should be solid. The standard USGI trigger obviously wasn’t going to cut it for Mr. Man, so we had some Scooby Dooing to do. I did some research, and asked the guys (and gals) at Distant Thunder USA, in Broussard, Louisiana what they would recommend. After doing some research on my own as well as receiving the recommendation of Mark Greneaux at Distant Thunder, a drop in trigger from Rise Armament (RA-140 Super Sporting Trigger) looked like an economical, and functional option. Let’s just say that Mark Greneaux knows his stuff. Who’s got two thumbs, and is NOT going to argue with a retired Navy S.E.A.L. who gave all of us 20 years of service? THIS GUY!
What you will need:
- Punches;
- Long armed Allen Wrench aka Allen Key (most pistol grips call for a 3/16″);
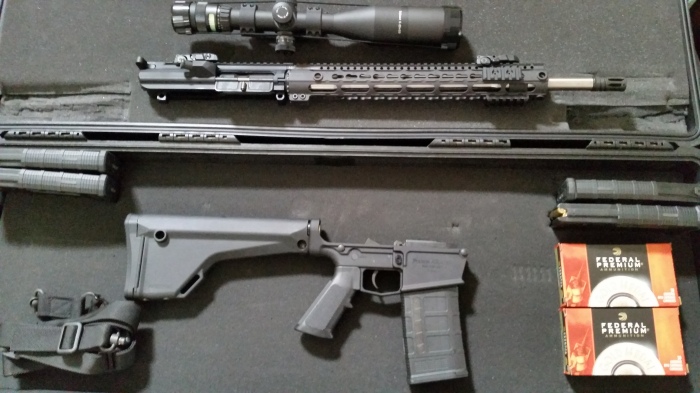
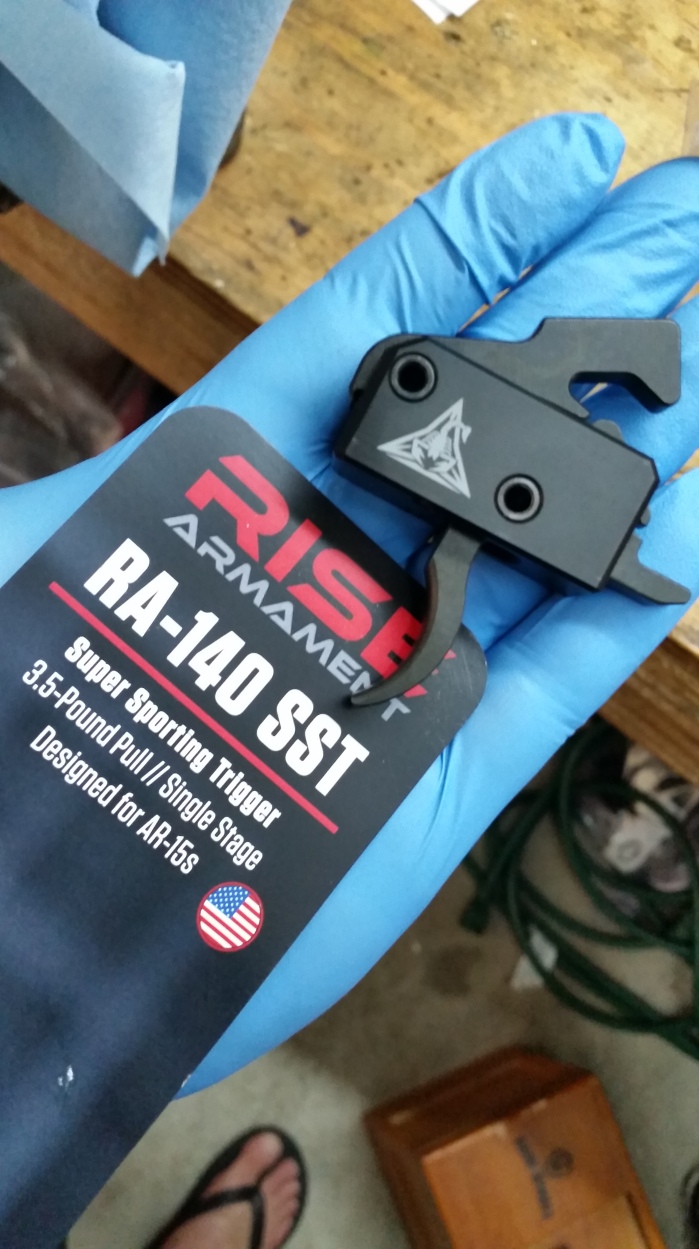
- Rise Armament RA-140 SST 3.5 pound drop in trigger;
- Bench Vice (not absolutely necessary, but helps massively);
- Time;
- Patience.
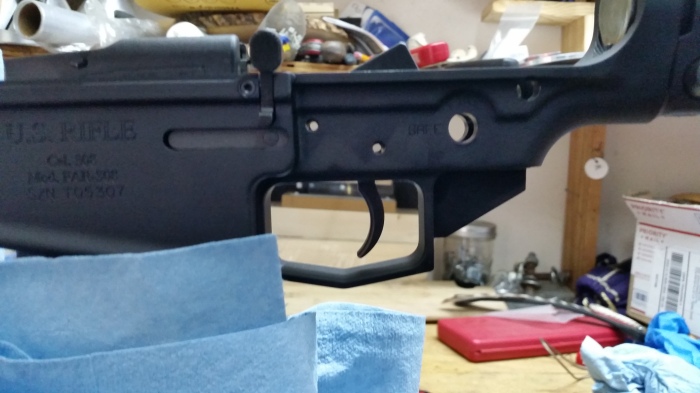
Removal of Pistol Grip & Safety Selector:
You will need to remove the safety selector so that you can easily get the old trigger out, and install the new Rise Armament SST.
- First, remove the pistol grip by unscrewing the bolt holding the pistol grip to the lower receiver with an Allen Wrench. Most call for a 3/16″, but I’ve seen a flathead screw on occasion.
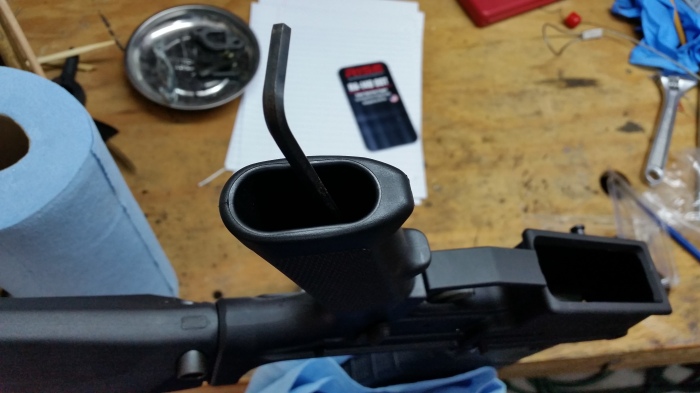
- Carefully remove the pistol grip, being careful not to loose the springs that the pressure of the pistol grip is retaining. Use glasses when working on this, because I’ve almost lost an eye when a very tiny, very metal part goes flying in my face.
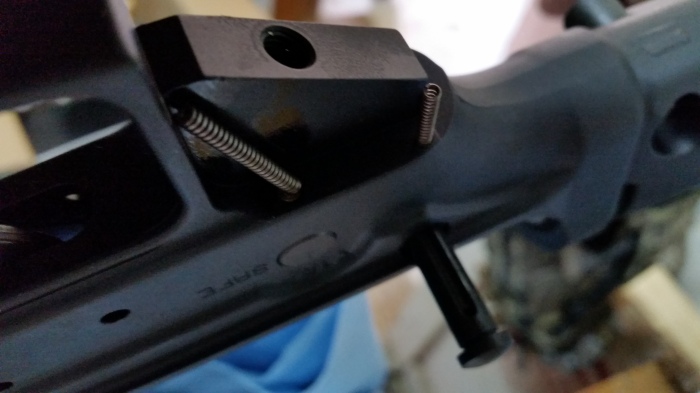
Be careful not to loose the safety selector spring, and detent, and the rear take down pin spring and detent.
- After collecting the springs, and detents holding in the safety selector, and rear take down pin, and placing them in a safe place, remove the safety selector.
Remove the safety selector, and store in a safe place to be reinstalled later
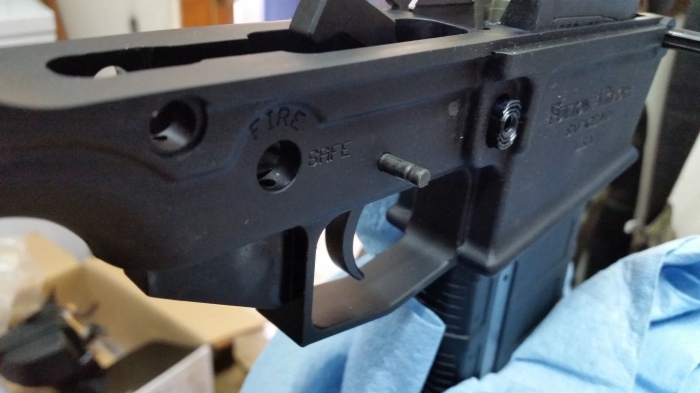
Removing the Old Trigger:
- Next you will punch out the hammer pin. Again, the hammer is under tension from the hammer spring, so remove your punch carefully as not to send small metal parts in to orbit.


- Punch out the trigger pin. Remove the trigger assembly from the lower receiver, and you are ready for install of the Rise Armament SST.
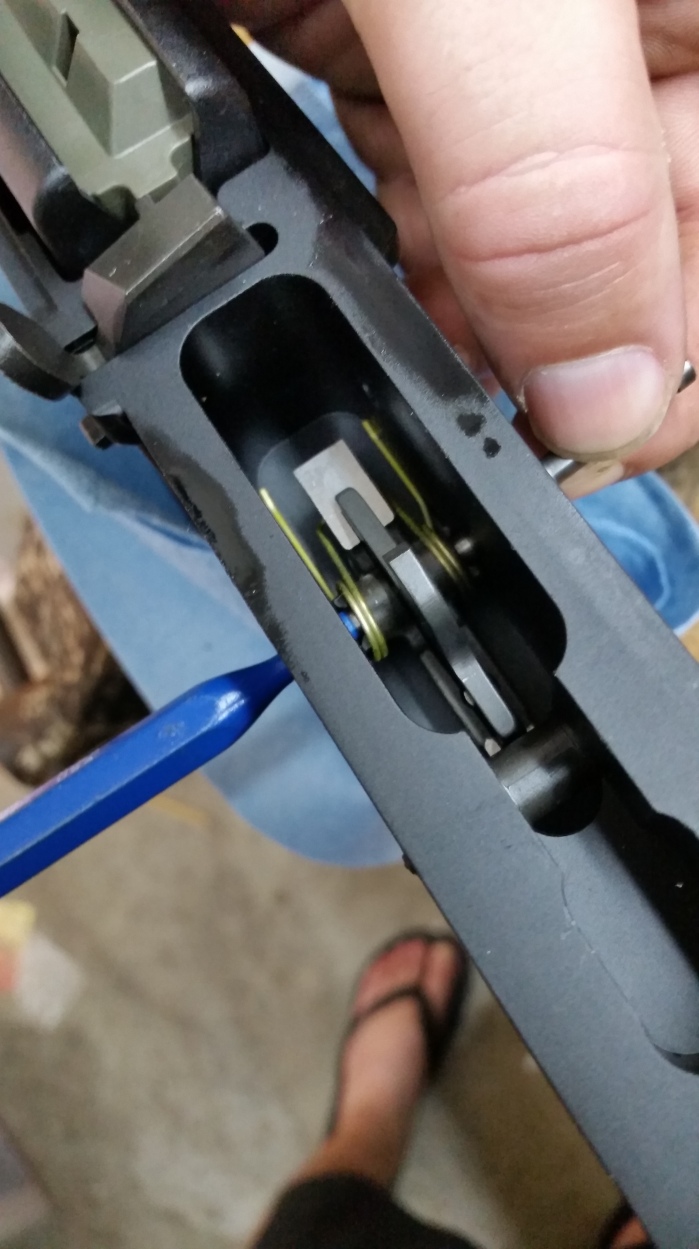
While wearing your Tactical Flip Flops, drift out the trigger pin with your punch, and remove the trigger assembly.
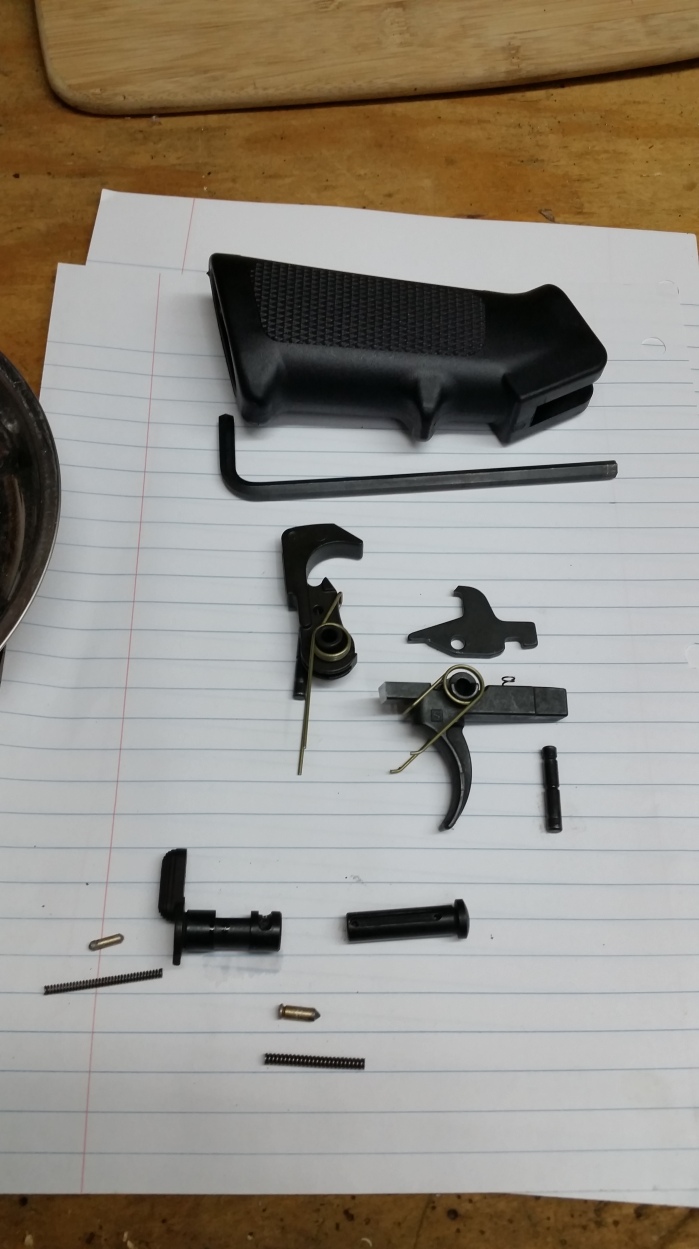
All of the parts that have been removed up to this point.
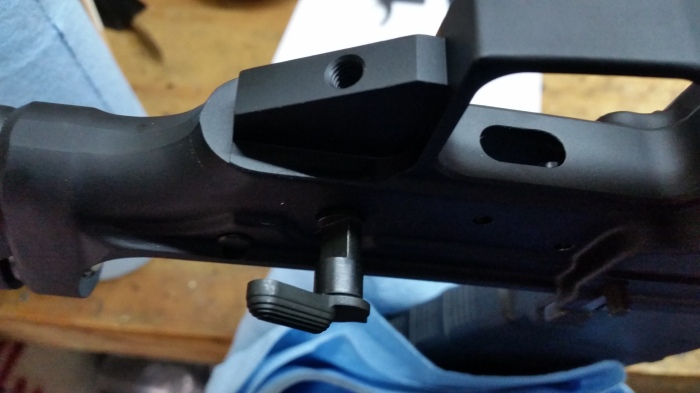
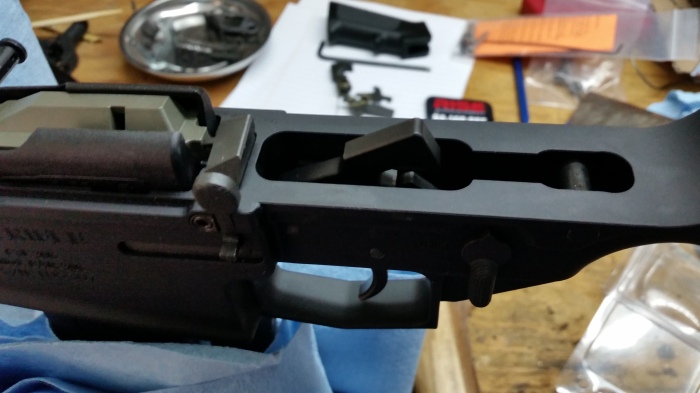
- Now we have an open trigger recess ready for install of a new trigger.
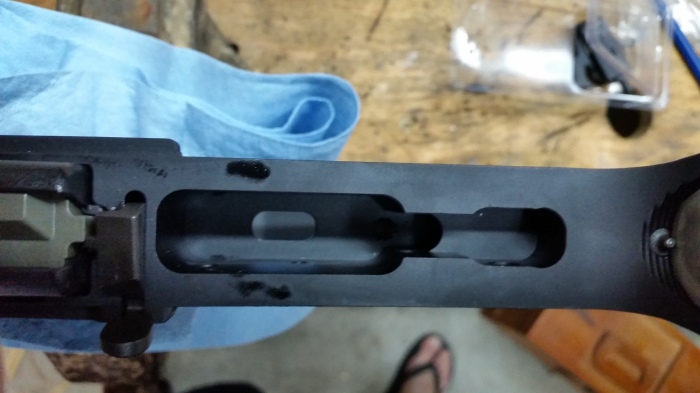
Ready for install of the new trigger
Installing the Rise Armament RA-140 SST:
Before I get started, I have to say something about this trigger group. I’ve installed a fair amount of triggers in a few types of fire arm, but this little dude was by far the easiest to install. It will take you 1/10th of the time to install this trigger than it did to remove all of the other crap. So, if you’re installing this thing in a stripped lower, then you’re going to love the Rise Armament RA-140 SST. To be clear, and in case you were wondering: Although I can be bought for the right price…Wink…Wink…No, Rise Armament has not sponsored this blog in any way. I’m just a fat kid who wanted to pass on some info that I thought might be helpful.
- Drop trigger group into the trigger recess of the lower receiver.
Drop in Rise Armament Trigger
- Align the hammer pin hole & trigger pin hole in the lower receiver with the self contained trigger group assembly.
Align some holes
- Tap in the hammer pin & trigger pin (tap with small hammer if needed).
Reinstall the pins
- Using a small flathead screwdriver, move the portion of the trigger spring out of the way of the two small holes for the trigger set screw. Insert a 5/64″ Allen Wrench, and hand tighten.


- Then tighten the other side, just tightening “hand tight.” Note that this step is only necessary if you’re not using anti-walk pins (which I am not).


POOF! You have a new trigger.
Ain’t She Purdy?
Put all the other crap back:
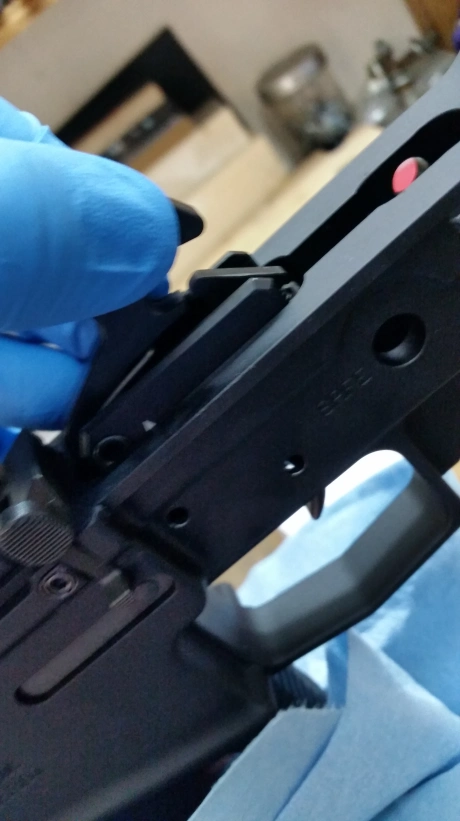
- Now reinstall the safety selector, flip the rifle over, and reinstall the safety selector detent & spring, then the rear take down pin, rear take down detent & spring, then the pistol grip being mindful not to bend the springs upon installation. Basically you will do the dyslexic version of the steps taken above.
Conclusion:
- Difficulty of Instillation: A pleasure. Super easy, as you’ve seen above.
- Trigger Pull: After testing the weight on a trigger pull gauge, she brakes cleanly between 3.42 lbs, and 3.46 lbs respectively. This comes within .08-.04 lbs of the advertised 3.5 lbs for this trigger. I might run it for a while to see if this loosens up a bit. Either way, I do not detect any perceptible creep, and it breaks predictably and cleanly. The weight and clean break make it a good option for a higher recoiling AR-10 (no accidental bump fires), off of a bench, or in a hunting situation.
- Trigger Reset: Short, and predictably consistent. The quick and positive reset allows for moderately quick shot succession.
- Trigger Adjustability: Not adjustable (to my knowledge). This trigger is specifically listed on Rise’s website as not adjustable.
- Price: Coming in at a retail price of between $125.00 – $140.00 it is on the cheaper side of most aftermarket single stage triggers. I believe it to be on par with a Timney drop in trigger, however the price is better.
- Quality: The quality for the price on this trigger is outstanding. I’ve definitely found another “go-to” trigger if this thing holds up to some abusive range time. So far, it seems to be preforming just fine. So far (limited range time) the quality is easily that of a Timney trigger, but is less expensive. The aluminum and tool steel construction is good stuff, and the CNC work looks legit.
I’d love to hear your thoughts, or experiences with this trigger system.

Thanks for the post! This is another article I’m saving for future reference. May need to order a pair of Tactical Flipflops before everything else, though. Cheers, my friend!
LikeLike
Ha Ha. Gotta have the Tactical Flipflops, right?
LikeLiked by 1 person
Wouldn’t dream of starting the job without them!
LikeLike
Wouldn’t dream of starting the job without them!
LikeLike
Why did you remove the takedown pin / spring / detent?
LikeLike
I removed the pistol grip in order to remove the safety selector, spring & detent. The pistol grip also holds the spring & detent for the rear take down pin, so it got removed so they would not be lost when I flipped everything back over to install the trigger.
Most trigger installs require that you remove the safety selector, but some don’t. The Rise Armament would not fit in this Fulton Armory lower without first removing the safety selector, so this was a necessary step.
LikeLike
I see that now. Forgot that some grips retain the takedown pin and some don’t. I installed the same trigger a few weeks ago. Nice tutorial. Thanks.
LikeLike
I’m glad to hear that it helped. What do you think of the trigger?
LikeLike
I’m hoping for the best. My first wouldn’t reset. The safety was difficult installing with the R-140 installed. If I had only the trigger or hammer pin (1 only) installed, the safety slid in easily. If both pins were installed, a few soft taps with a plastic mallet were required. The pin holes in the trigger module aligned with the rcvr just fine. Once the safety switch was installed it felt normal toggling between safe/fire. My preliminary analysis of the safety, once installed, was that it appeared to be “just” blocking the trigger from resetting. But then again, bench testing the trigger outside the receiver, it wouldn’t rest 100% of the time and just felt “strange” in its range of motion. BTW, the newer triggers now have a hammer lock setting designed into them similar to a 1911. If the hammer is in the fired position and you slowly pull it back, within a 1/4″ or so it clicks and stops; just like it’s cocked. Pull it all the way back and it does a second final click and is cocked. That “undocumented” feature was driving people crazy who were trying to troubleshoot my trigger. I spoke with a Rise Armament rep and he informed me that months ago they had incorporated that feature. I used the recommended KNS anti-rotation pins. The two set screws were installed from the manufacturer with 1-2 threads worth of the screws extending through the bottom of the module.Trying to back those set screws out, I ultimately snapped seven of the 5/64″ hexes and twisted two other into spirals. I managed to get one screw out and threads from the module came with it. But I don’t really know. They kindly sent me a new trigger and in an email I received from them, they stated that they had seen issues similar to mine in the DPMS Oracle which is the AR I installed the trigger in. Personally, I feel if they had that knowledge then perhaps a little caveat, etc would have been nice with the advertisement of the trigger. Received the new one moments ago. Hope it ‘s a go. On one of the forums I participate in, one of the more knowledgeable members “knows” what the issue is and made me a drawing on how to remedy it. I did fire about ten rounds (single shots) and appreciated the lighter, clean trigger pull. I measured the pull in the weapon with my fancy little Lyman digital trigger pull gauge. It averaged out to 3lbs / 12oz. The original factory measured an astonishing 8.1 lbs. Anyhow, that’s how it went. Fingers crossed. 🙂
LikeLiked by 1 person
Wow, sounds like you had a great deal more install issues than I did. Everything dropped in pretty easily for me, but sounds like you ended up with a slightly heavier trigger pull than I ended up with in mine.
Thanks for letting everyone know about your issues, and about the fitment issues with the DPMS Oracle.
LikeLike
You bet. I’ll let you know how it goes. I plan on installing it tomorrow. Thanks.
LikeLiked by 1 person
The aluminum trigger housing required filing the forward edges on each side as well the angles near the front. basically it was creating a radius with a needle file. Ultimately I turned the intersecting angles as the edge begin to slope downward into a gentle roll. Perhaps a 1/1000th or so was only needed to be removed but I believe I finished with removing about 3/1000. I took it down on each side and that upper forward slope as far as I could without actually touching the happen pin sleeve / opening. Regarding those set screws, I thought here we go again. I had only one 5/64″ hex left that I bought the other day for 7.00. Couldn’t budge either screw however the allen was holding its own. I took a .223 case and used it as a handle. Each screw broke loose and then I was able to set aside the case. It was very easy to feel each screw make contact with the floor of the trigger housing. Need to get a quality set of T-handle hex wrenches. It actually worked (better lucky than good) and today I tested it with two uppers. Functioned well and I’m pleased with the results.
LikeLike
Glad to hear it worked out.
LikeLike