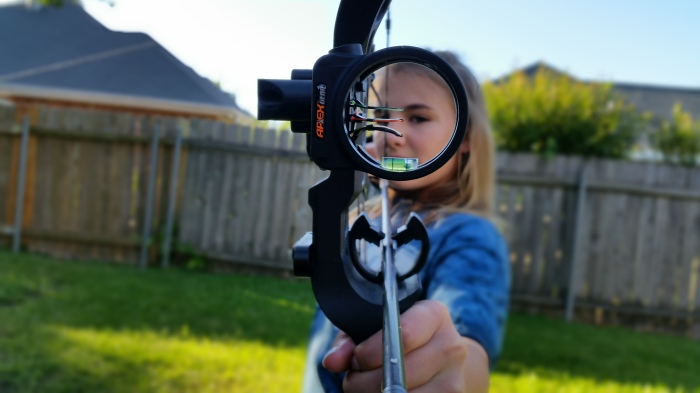
Due to a shoulder injury, its going to be a rough bow season for this dude. So it looks like I’ll be living vicariously through my daughter. Assuming we can get her ready by October 1st, that is. By the way, old, fat, ugly guys have no business body surfing in rough seas… for the sake of your bow season, don’t ask, just trust me on this.
So, we are setting up my daughter’s Diamond Prism so that we can get her shooting like a champ in hopes of another great season. This will be her first year bowhunting. Wish us luck!
Setting The Draw Length:
If you want to set the correct draw length, then you will need to know your draw length. No kidding, right?
Here’s how to determine your rough draw length:
- Get a tape measure, and hold your arms out to your sides.
- Then get someone to measure from the tips of your middle finger to your other middle finger (you know the finger you “point” with when someone cuts you off).
- Take that number, and divide it by 2.5, and that is your rough draw length. For instance my daughter’s was 57.5 inches from finger tip to finger tip, so 57.5″/2.5 = 23″ draw length. And don’t ask me why 2.5 either…IT JUST IS OKAY?
So on this bow you remove two screws, on the bow’s cams, then turn the little draw length “dial” to the desired draw length, and screw it back in. Piece of cake.
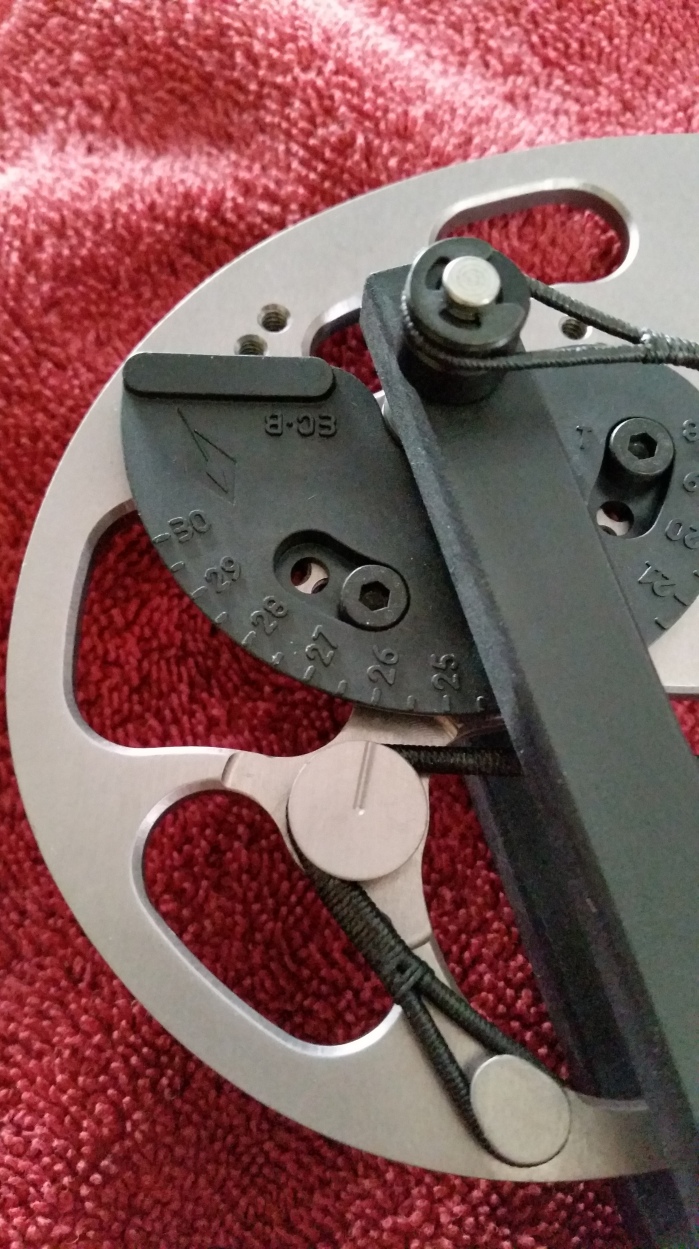
The bow came set to 26″ draw
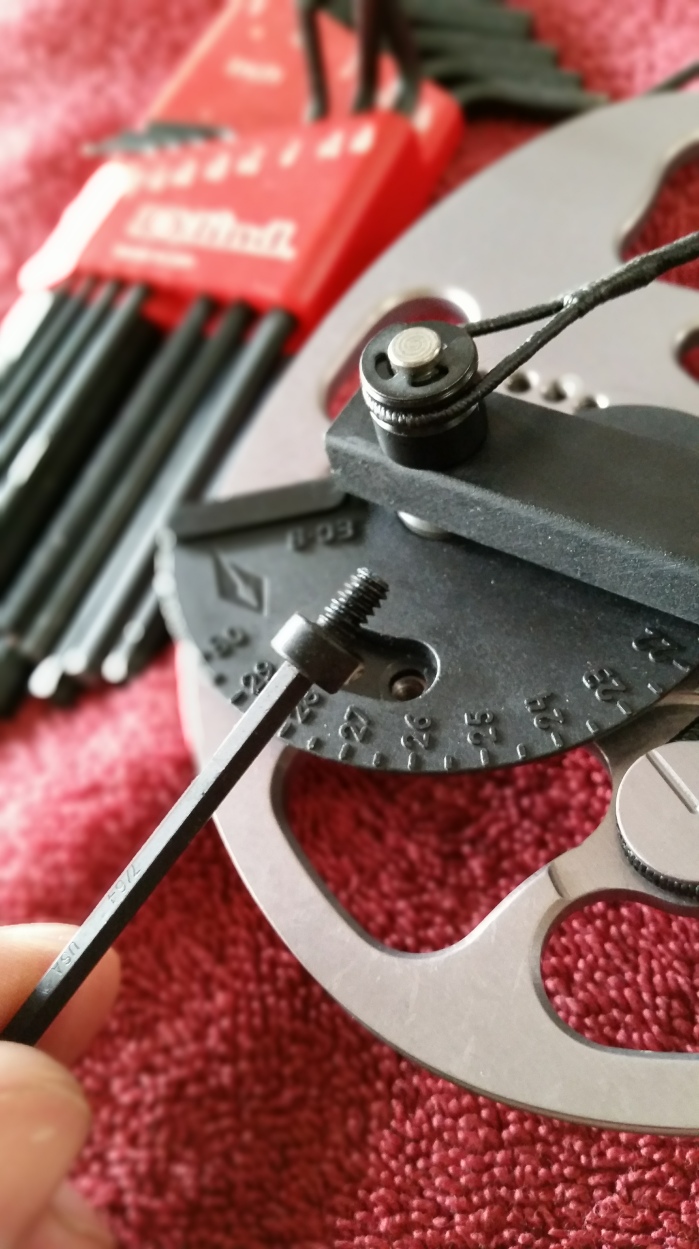
A few turns from a 7/64 Allen Key, and we were in business @ a whopping 23″ draw.
Setting the Draw Weight:
This part is pretty simple. Take a 3/16th Allen Key, and “Wax Off” is lefty-loosie, and “Wax On” is righty-tightie. Just remember that whatever you do to one limb, you must do to the other. So, don’t go tightening the crap out of just one limb until it goes all poop-tarded on you. It will blow up your bow, your cams will be out of tune, and then you show up all snotty nosed, crying about how I blew up your bow. No sir, that was your stupid. I got plenty of my own to deal with (like fat boy body surfing).


Keep things even Steven by making half turns. You can also scribe a witness mark at 12:00 & 6:00 on the bow, and adjustable bolt with a pencil or paint pen to know when you’ve made a half or full turn. First a half turn to the top, then bottom until you reach your desired draw weight. I don’t have a bow scale, so we loosened this guy until my daughter got to a comfortable weight. Don’t forget that the string will stretch a bit after you shoot for a while, so you may have to tighten it some after a couple of shooting sessions. We will gradually work our way up in draw weight (re-tuning along the way) until bow season. We have to get to a 30lb minimum (currently) according to the game laws in Louisiana. Check your laws because they may be different, and they can change year to year.
How to Check Tillering:
After you set your draw weight, it is always a good idea to check (and adjust if necessary) your tillering. The Tiller of a bow is ensuring that the distance from the top limb to the string, and the bottom limb and the string are the same. This ensures that your top and bottom limbs (and/or cams) have proper timing. When you release the string, you want both the top and bottom to be drawn to the same distance, and thus put equal force directly behind the arrow. The bow will have less hand shock, more power, and will be much easier to tune.
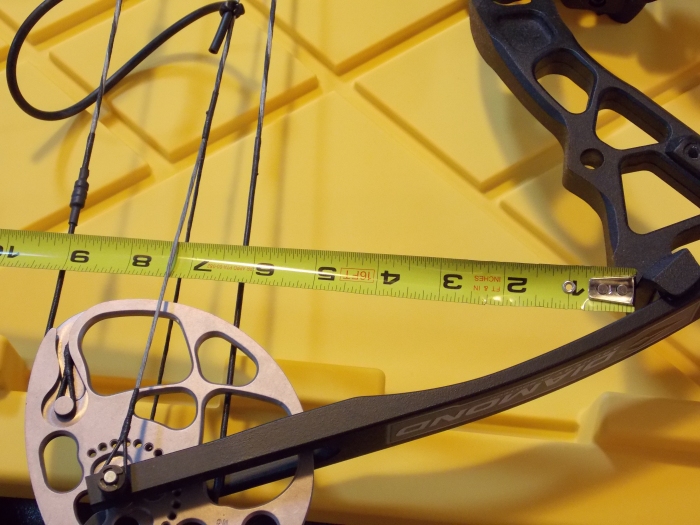
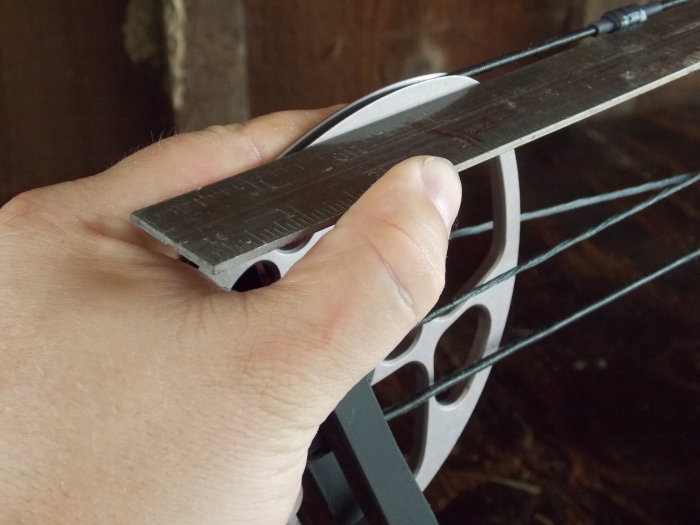
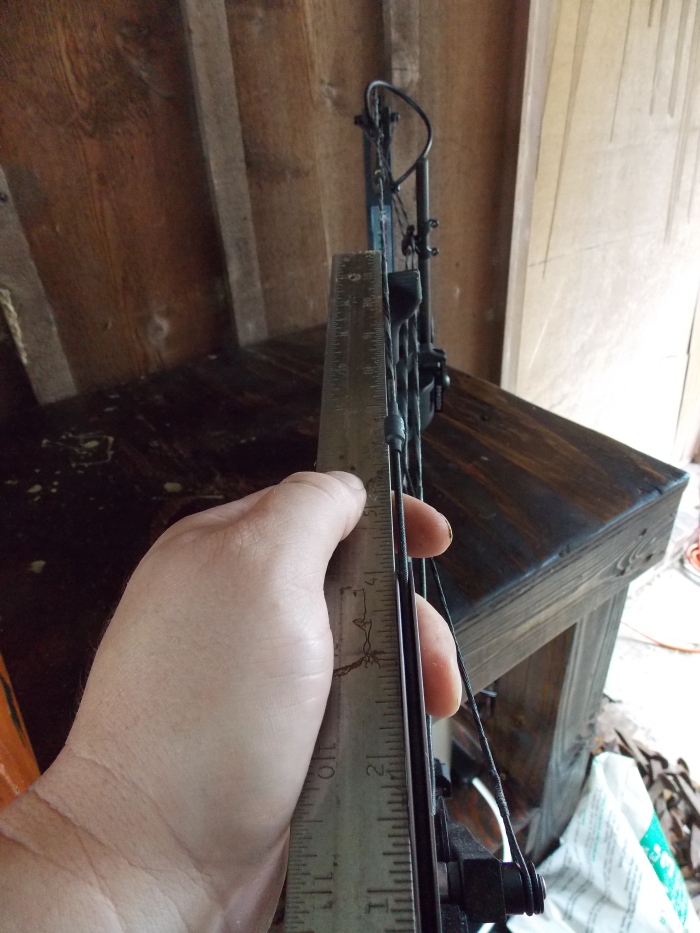
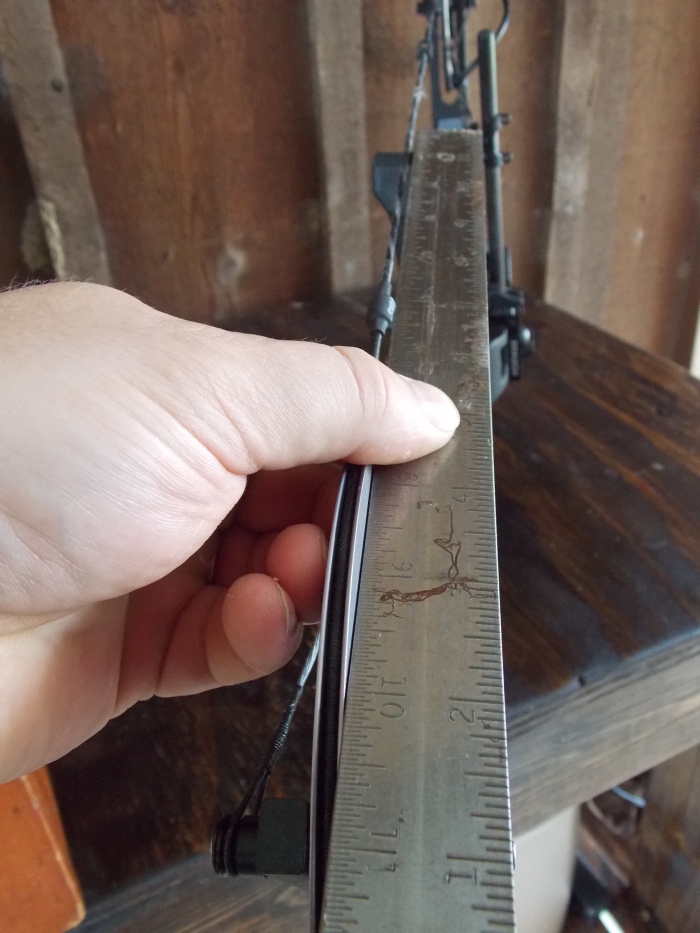
This is easy. First measure the distance from a set point on the top riser (this can be from the limb bolts, or in my case a particular flat part of the inside of the riser) to the bow string. You also want to measure to the same part of the string. So you can measure down from were the string leaves the cam on the top and bottom, and measure to that point on both.
Measure from a point on the riser to the bow string on the TOP RISER.
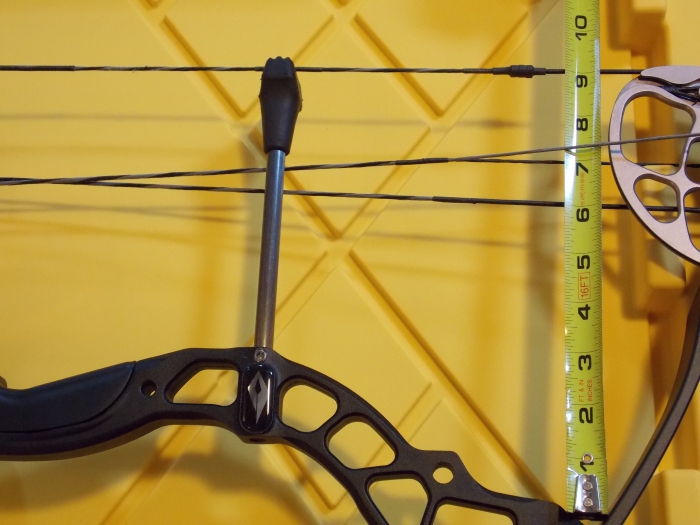
Then measure from the same point to the string on the BOTTOM RISER.
If the distances are the same, then your bow is properly tillered. If it is different, then you will either need to loosen the limb bold on the side that is shorter (which will slightly lower the draw weight); or tighten the limb bolt on the one the riser that measures a shorter distance (which will slightly increase draw weight). Do this until the two sides are equal. In my case both sides are exactly 9 1/16″, so we are golden.
Do this every time you adjust the draw weight to make sure that you are keeping both limbs the same.
Setting Nock Point:
Either using a bow square (which are really cheap), or you can use a regular construction type or speed square with an arrow taped to the top, you will insure that the arrow nock point is level with the arrow rest.
Then after you have determined “Zero” or exactly level from the arrow rest, I set my bows up to where the center of the nock of the arrow will be 1/8″ above zero. We can adjust this later if necessary when tuning. Simply use a pair of pliers (they make a pair specifically for this), simply crimp down the brass knock set. You can also do this with a regular carpenter’s square with an arrow taped to it. Simply place the carpenter’s square on the string, square it up, and mark the location of the arrow nock. You can then adjust upwards of 1/8″ or more from there.
Place Bow in Press:
At this point you will either need to (1) put your bow in a bow press; (2) pay someone to put your bow in a bow press; or (3) make one for yourself!
If you don’t have an extra $500 lying around for a brand new bow press, then let not your heart be troubled. To see how I rolled my own bow press, click on How to Make a Cheap Bow Press.
Either way, you will end up with the tension having been removed from the bow string.
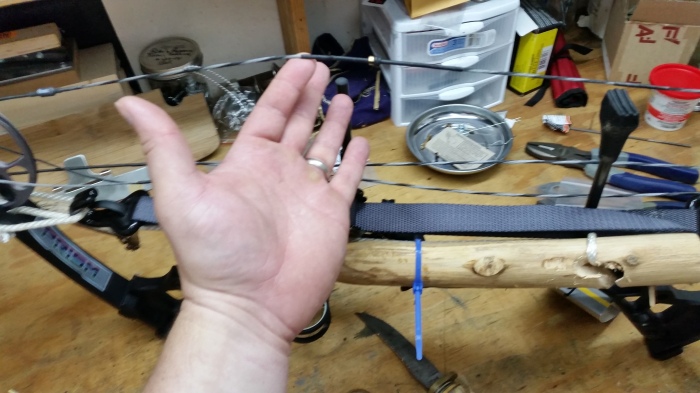
High Tech Redneck! Man, my hand needs to lose some weight! Now I’ll never be a teen hand model!
There is also a cheap alternative to my Cheap Bow Press Methods that do not risk bodily harm or destruction of property, called a Bowmaster Portable Bow Press. They are about $40, and if I continue to do all of the work on my daughter’s (and hopefully other kids’) bows in the future, I’m going to have to break down and get one.
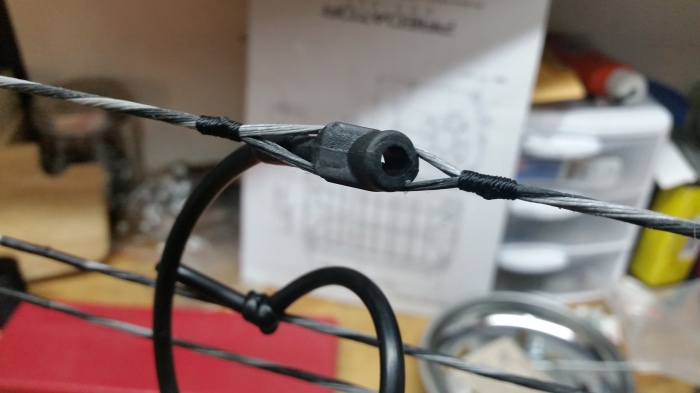
Setting Up the Peep Sight:
Now that we have no tension on the string, we can install the peep sight. This would also be the time to install any string silencers that fit in the string.
Slip something between the center of the twisted string’s braids. I used a technical tool specially made for this process…a chopstick.
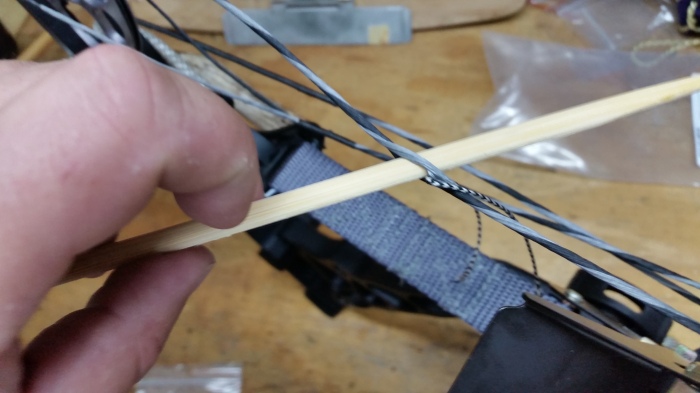
Then, I installed the peep working the two halves of string into the grooves on either side of the peep.


We will use serving on the top and bottom of the peep to hold it in place, but not yet because I want to be able to slide it up and down to adjust it to my daughter. Then we will serve it.
Installation of the Stretchy Band-ie Thingy:
Next, slide the silicone stretchy band-ie thingy onto the end of the peep. Note, that some guys use rubbing alcohol to wet the tube so that it will go on easier. I don’t for fear of dry rot. In the field, you can lick it. I didn’t use anything, and it went on just fine.
Then you tie the band off with a half hitch, then another one the other side of the string, and poof, a peep sight.


Unless the bow shop is setting your bow up for free because you just spent a Gagillion Dollars on a new bow, then they will charge you for their time to set your bow up. These are some things that you can do easily at home with simple tools that cost you nothing but some time. Then you can spend the dough you saved on better equipment.
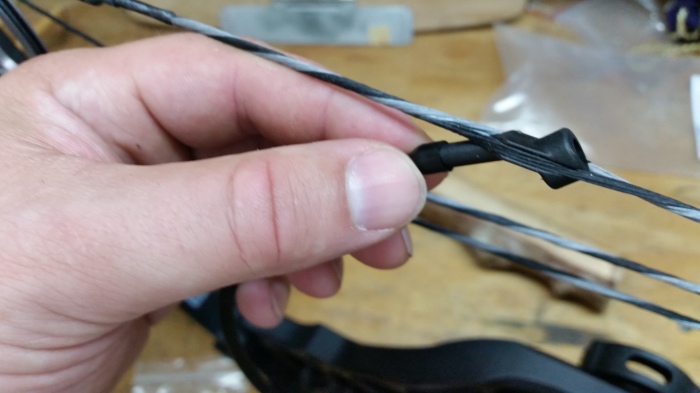
Fitting the Peep Sight:
Next, we measure the proper location for the peep sight. To do this have the archer close their eyes, draw the bow, and anchor at full draw in their natural shooting position.
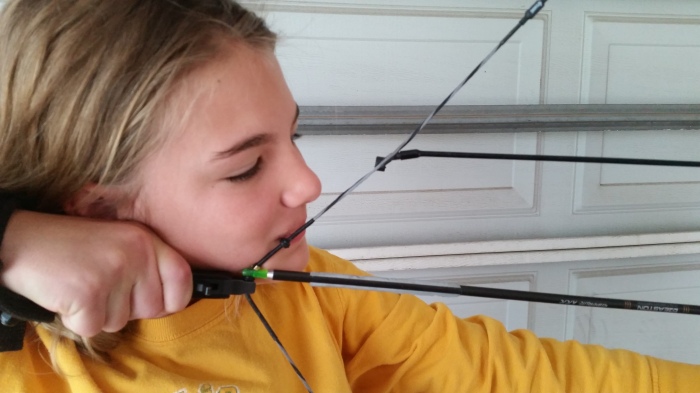
Emma getting fitted for her peep sight (we had to move it down btw)
Once the peep is in the correct position, you can tie serving on either side of the peep sight to keep it in position. To see the video of us tying the serving for this peep sight, and Emma Kate’s first bare shaft shot with her new bow, check out **Video** How to Tie Serving – Serving a Peep Sight.
As the French would say: “Missure, your peep sight is served.”
How to Check for Cam Lean:
This is a simple process. Get something strait (i.e. ruler, square, arrow, etc.), then place the strait side against the flat edge of the cam. Your strait edge should be neither touching the string, nor drastically veering away from the string. Do this to both sides of the Cam.
The distance from your strait edge to the string should be virtually the same on both sides of the cam.
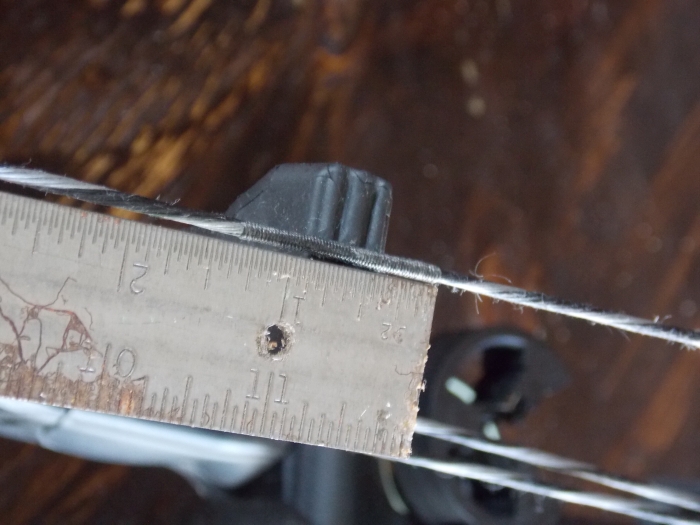
The distance from the string should be virtually the same on both sides
Do this test to both sides of both cams. If the cams of your bow are out of alignment, then you will need to straighten them or seek a professional to do the same.
- To fix cam lean on the top cam = You will need to place the bow in a bow press. If the top of the top cam leans to the right, then you will need to tighten the yoke on the left side of the bow, or loosen the right side. The opposite is true if it leans left. This will be trial and error on how many twists until the top cam is in alignment. The yoke are the loops that attach to either side of the axle going through the cam.
- To fix cam lean on the bottom cam = If the bottom of the bottom cam leans right you will need to add spacers the proper distance to place the cam back in alignment. This can be a real pain in the duff, so unless you hate your Saturdays, or really don’t want to pay a bow shop, then I’d suggest just bringing it to a bow shop if the bottom cam lean is bad enough that you can’t get your bow to tune properly. Remember, these can be slightly out of alignment, and still tune properly. I like to get them spot on to give the bow 100% of its power.
How to Square The Arrow Rest:
Prior to final tuning, you will want to assure that your arrow rest is square to the string, and bow limbs. To do this, simply knock an arrow, and position the bow where you are looking down the bow from above.
You can see this bow’s arrow rest was slightly to the left, so we made a slight adjustment to the right.
You will sight down the bow, and use the riser bolts to determine if the arrow is to the right or left of center. If you prefer you can use a ruler, or even tape a laser to one side, and align with the center of the other bow limb. I just eyeball it, because you man need the bow rest slightly off center during the tuning process.
To adjust, simply unscrew the lateral movement screw, and move in the rest in the direction that you want the arrow to move (in this case we moved it to the right to make the arrow move to the right on the rest)
Make an adjustment in the direction that you want the arrow to move. Right for right, and left for left until the arrow is roughly in the center of the limb bolts.
![]()
Unless the bow shop is setting your bow up for free because you just spent a Ga-Jillion Dollars on a new bow, then they will charge you for their time to set your bow up. These are some things that you can do easily at home with simple tools that cost you nothing but some time. Then you can spend the dough you saved on better equipment.
Now you have the majority of the pain in the rump stuff squared away. You can now begin the arrow tuning process. I hope this helps someone save a little cash, and have a better hunting season.
Keep in mind that bows vary from year to year, and by make, model, type, and manufacturer. Make certain that you are adjusting your bow according to the recommendations of the manufacturer for that year, make and model.
Categories: archery, bowhunting, diy, hunting

This article betrays an incredible wealth of experience and expertise! Very well written, my friend!
LikeLike
Thanks Tygus. Years of mistakes sure can teach a great deal. I try not to make the same mistake twice. However, I sure have made a great deal of differing mistakes once!!
LikeLiked by 1 person