Bone Broth Ain’t Fa Suckas
Healthy, rich, delicious, easy… No, I’m not talking about me (although 1 out of 4 ain’t bad, right?). I’m talking about deer bone broth made from the few parts that I normally discard from the deer I harvest. I never thought that it would be worth my time and effort, but WOW is it good. It does take some time; however, nearly all of that time is the set-it-&-forget-it kind of time.
My family cooks with a veritable poop-load of broth, or stock. Just about any time a recipe calls for water, I use stock or broth because I like the flavor and richness that it imparts into the dish. By the way, I’ve always wondered what the difference between stock and broth is, so I’ll fill you in on what the almighty interwebs revealed to me. Apparently the general consensus is that the difference between a stock and a broth is that you can drink a broth alone as a meal, and a stock is used only as an ingredient to dishes, but never as a stand alone.
I do know one thing, I wish that I’d been doing this all along, because it’s crazy easy, and saves a part of the deer that I was just throwing away (after schlepping all of that weight through the woods, I’d like to see it go somewhere other than a trash can). It turns out that bone broth is quite healthy, I can adjust the amount of salt, and flavors in the broth, and it adds an amazing level of flavor to any dish lucky enough to include it. Seriously, it’s next level when it comes to taste, texture, and eye appeal for your next recipe.
How to Make Bone Broth From Your Deer
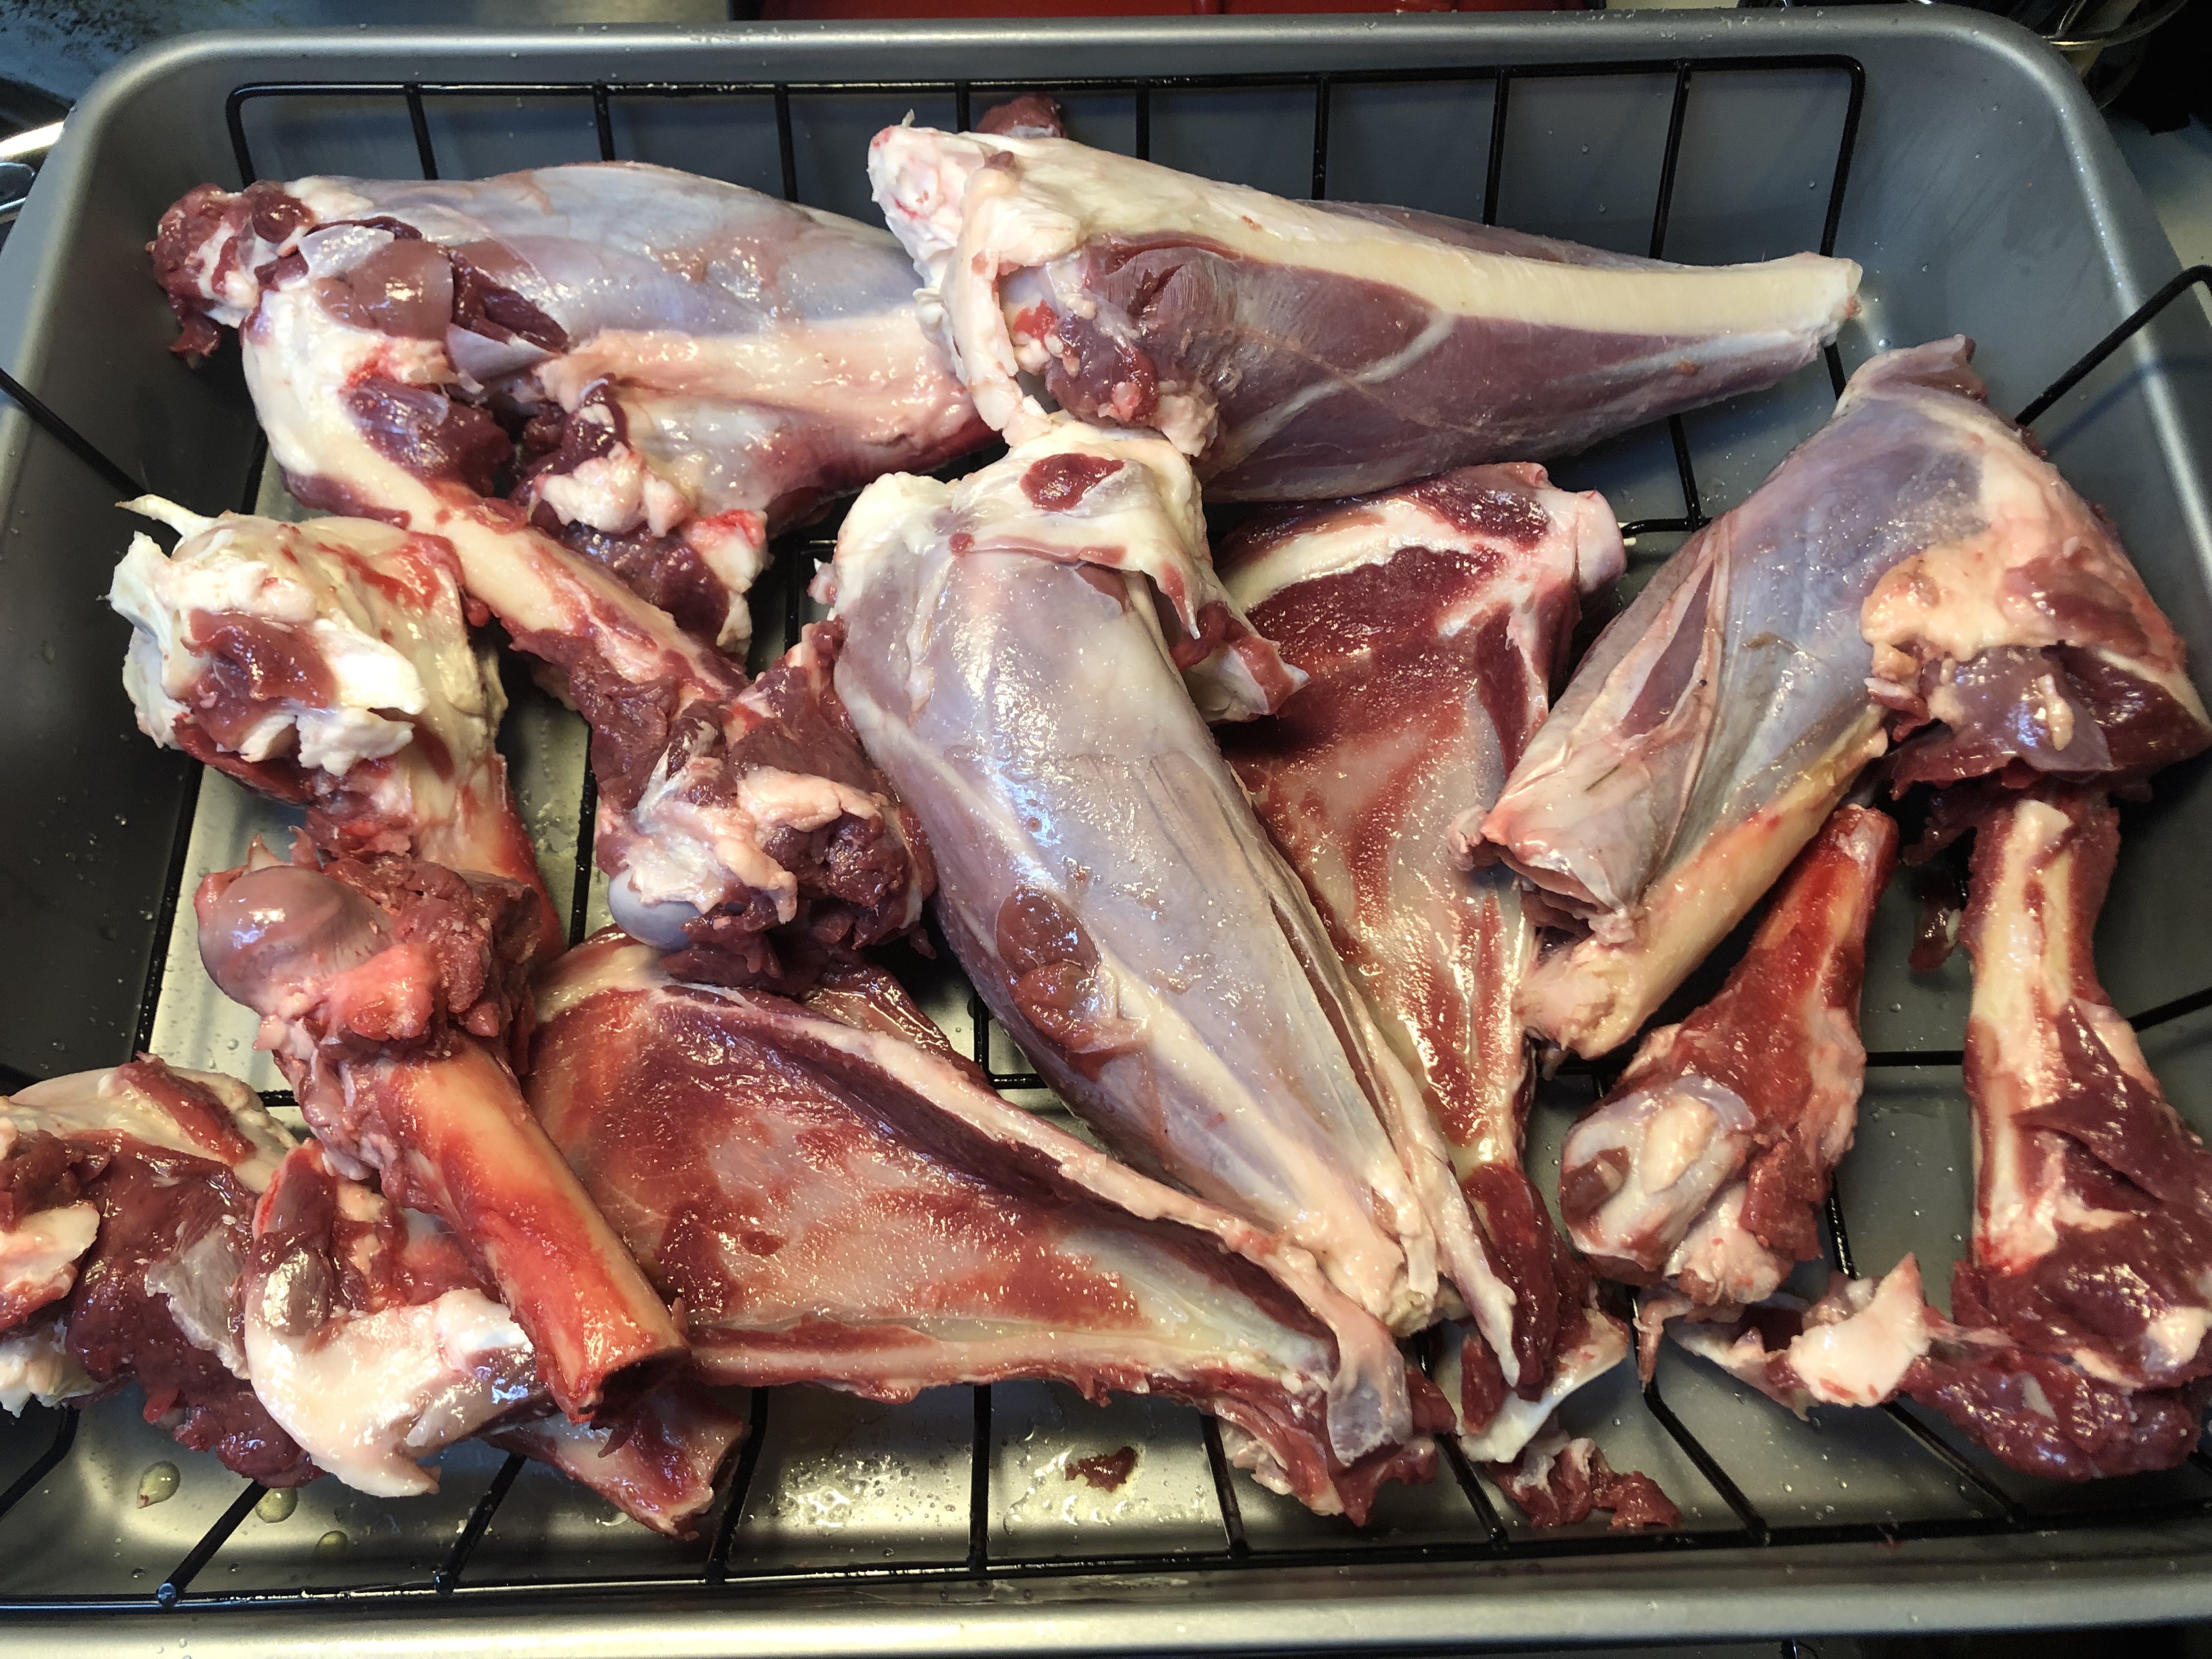
After you finish boning out your deer, you should be left with quite a few bones. The picture above is what I was left with after boning the front shoulders, and the hams of a medium sized whitetail doe. As you can see I left the meat on the hocks to add all of those tendons, and connective tissue as well as a little more meat to the broth. I also did another batch with the spine, and ribs after this batch. They all turned out great. One tip: don’t include any blood shot meat or bone as it will add a funkiness that I don’t believe you’re looking for.
(1) Place your bones in a roasting pan (any pan will do here, but a roasting rack helps to brown the bones on all sides). I got the one in the picture from a dollar store for like $5 and it came with the rack.
(2) Smear the outside of the bones with olive oil, and salt them.
(3) I cut some of my bones, and some I left whole. In a perfect world I would cut through as many places as I could in order to expose the marrow and create as much surface area as possible, but didn’t have the time or the saw for that, so only cut a few. This also has much to do with what size pots and pans you have at your disposal.
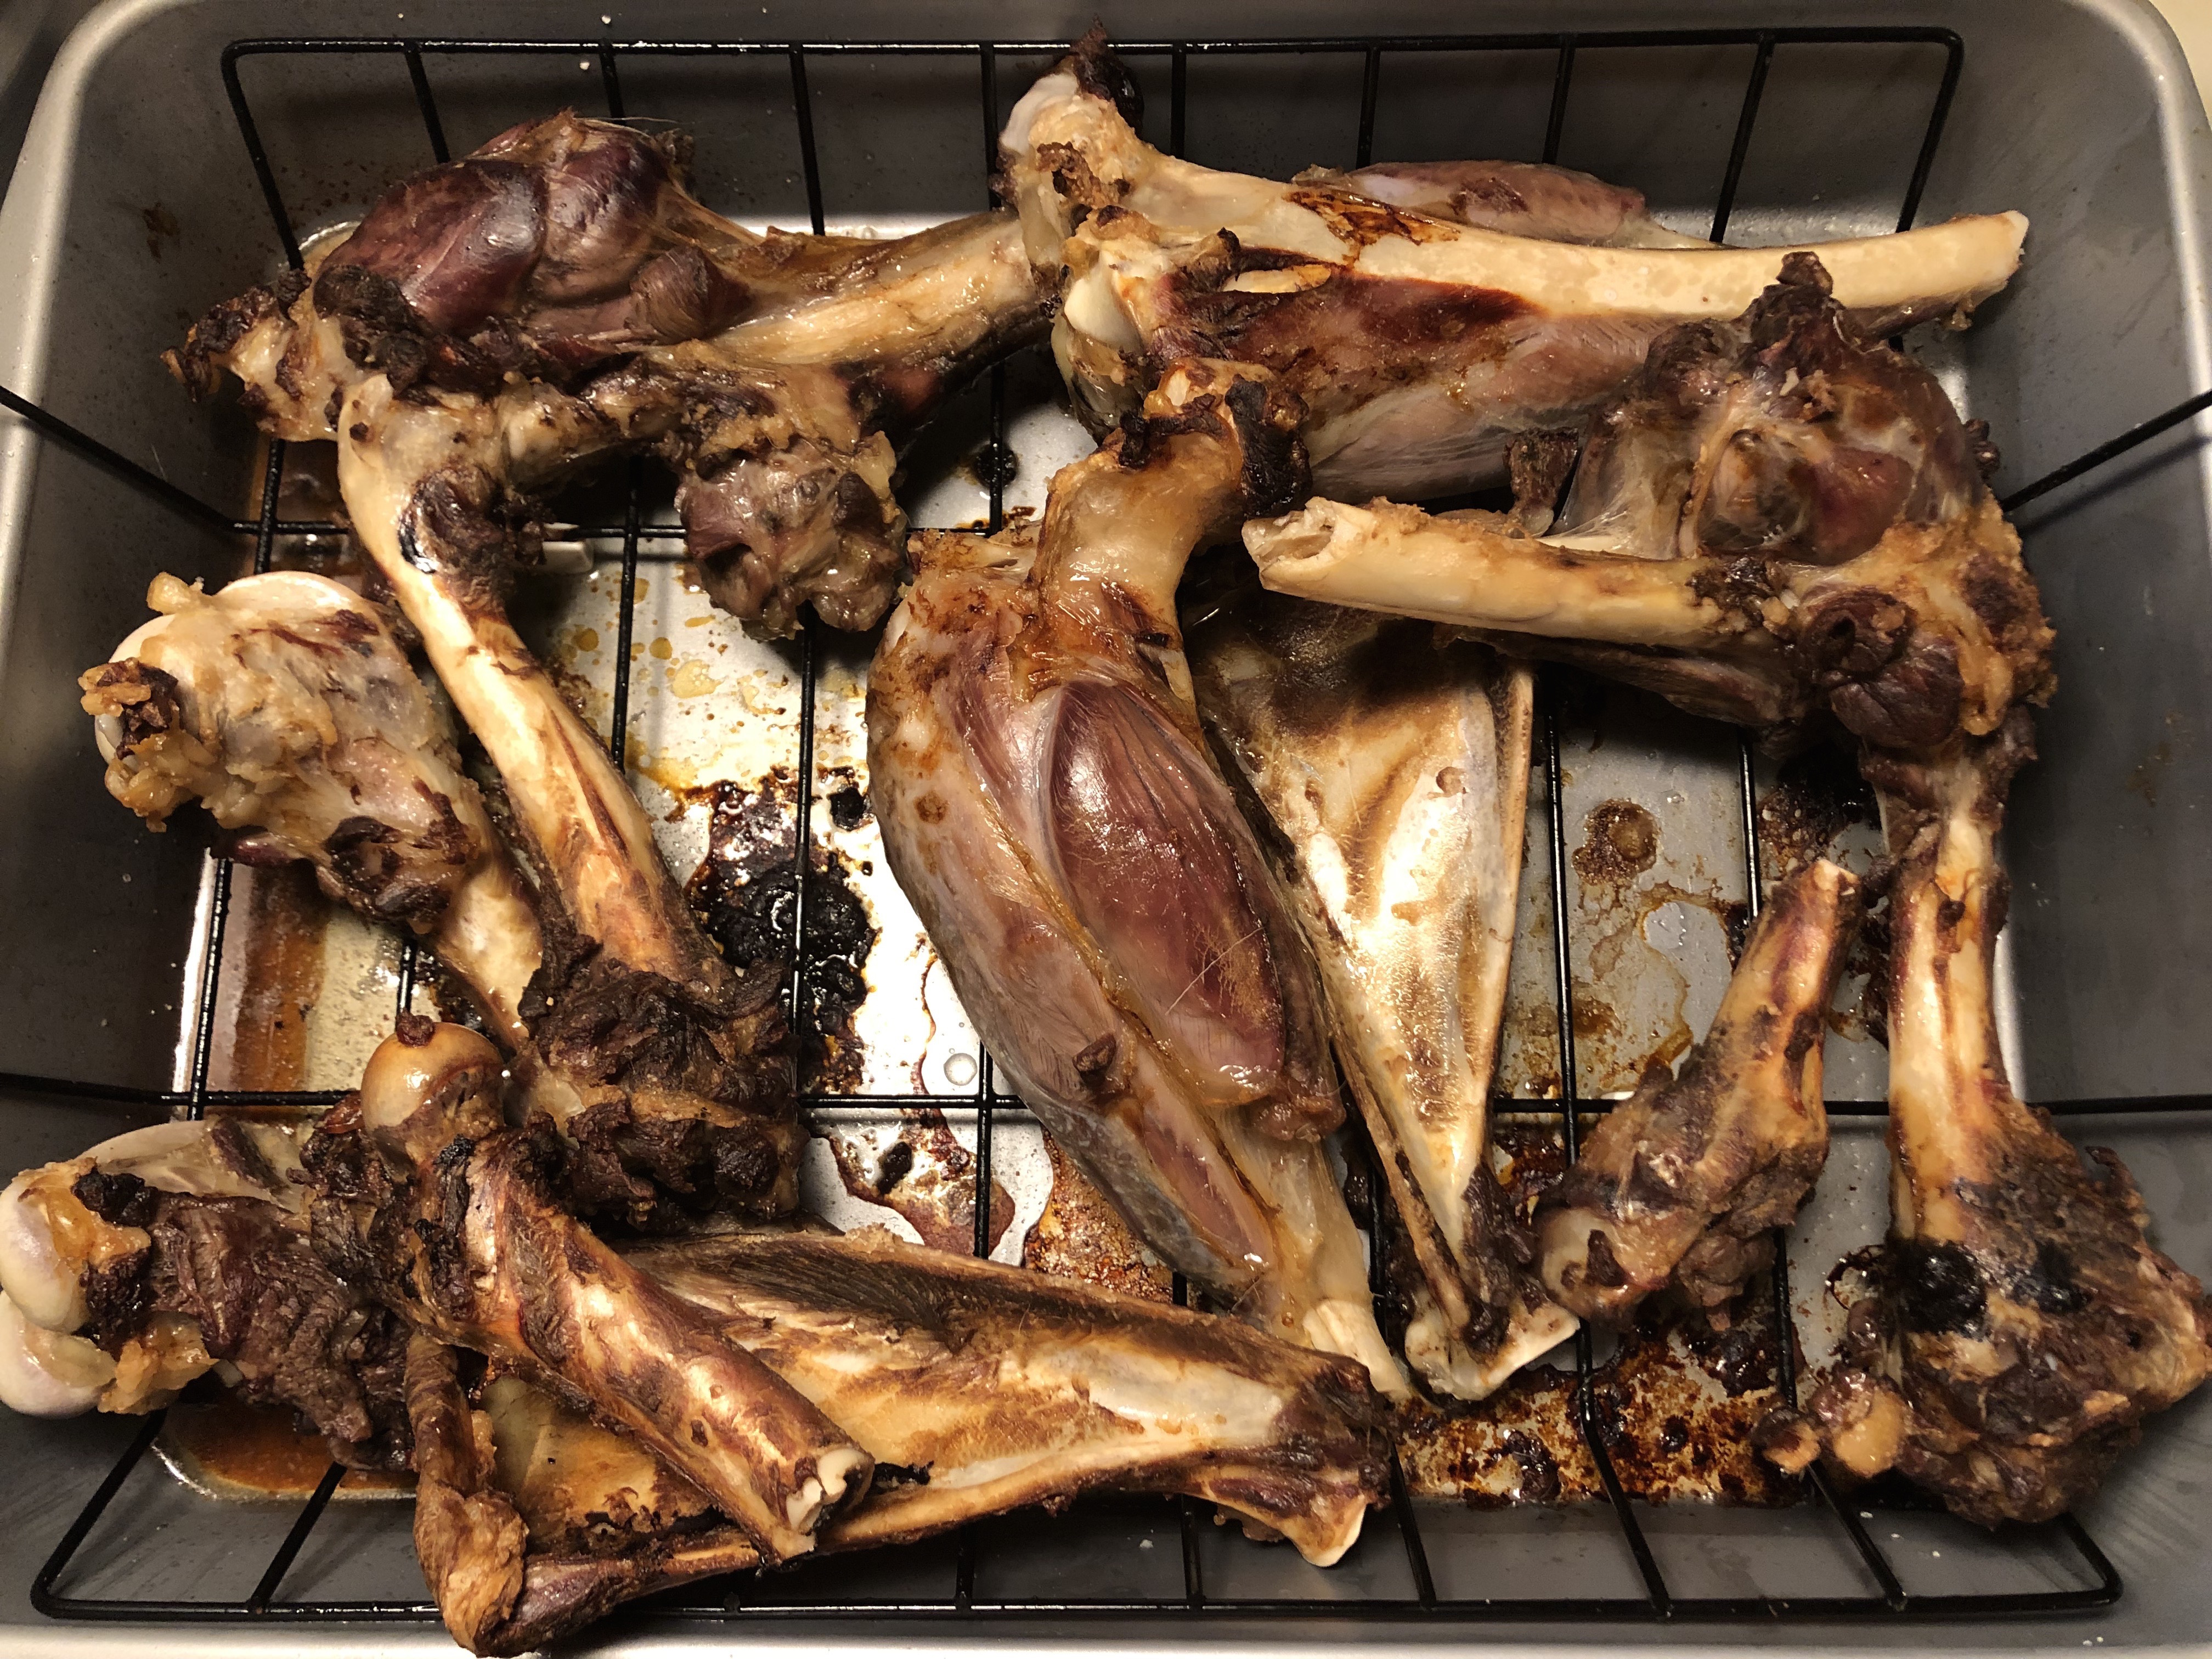
(4) Set your oven to 400 degrees, and plop those bad boys in there for about an hour. Depending on the size, species, etc. you may wish to adjust the time that you leave them in your oven. Larger bones like a large bull elk, or moose would obviously take longer than a small whitetail doe. Remember the darker you brown them, the more flavor you will have in your broth, but don’t burn them or it will impart bitter flavors in your broth, so keep an eye on them. Also feel free to include any silverskin or connective tissue from when you trim the meat (exclude as much fat as possible).
(5) After you have a sufficient browning on the bones (I wish that I would have gone a little more), you will remove them from the oven, and place them in the stock pot. Make sure to include any of the drippings (also known as “fond” which is French for “base”) into your stock pot as well. It is sometimes easier to add a little water to the pan, and scrape the crusted drippings off of the bottom to get all of that browned drippy goodness. You can thank me later.

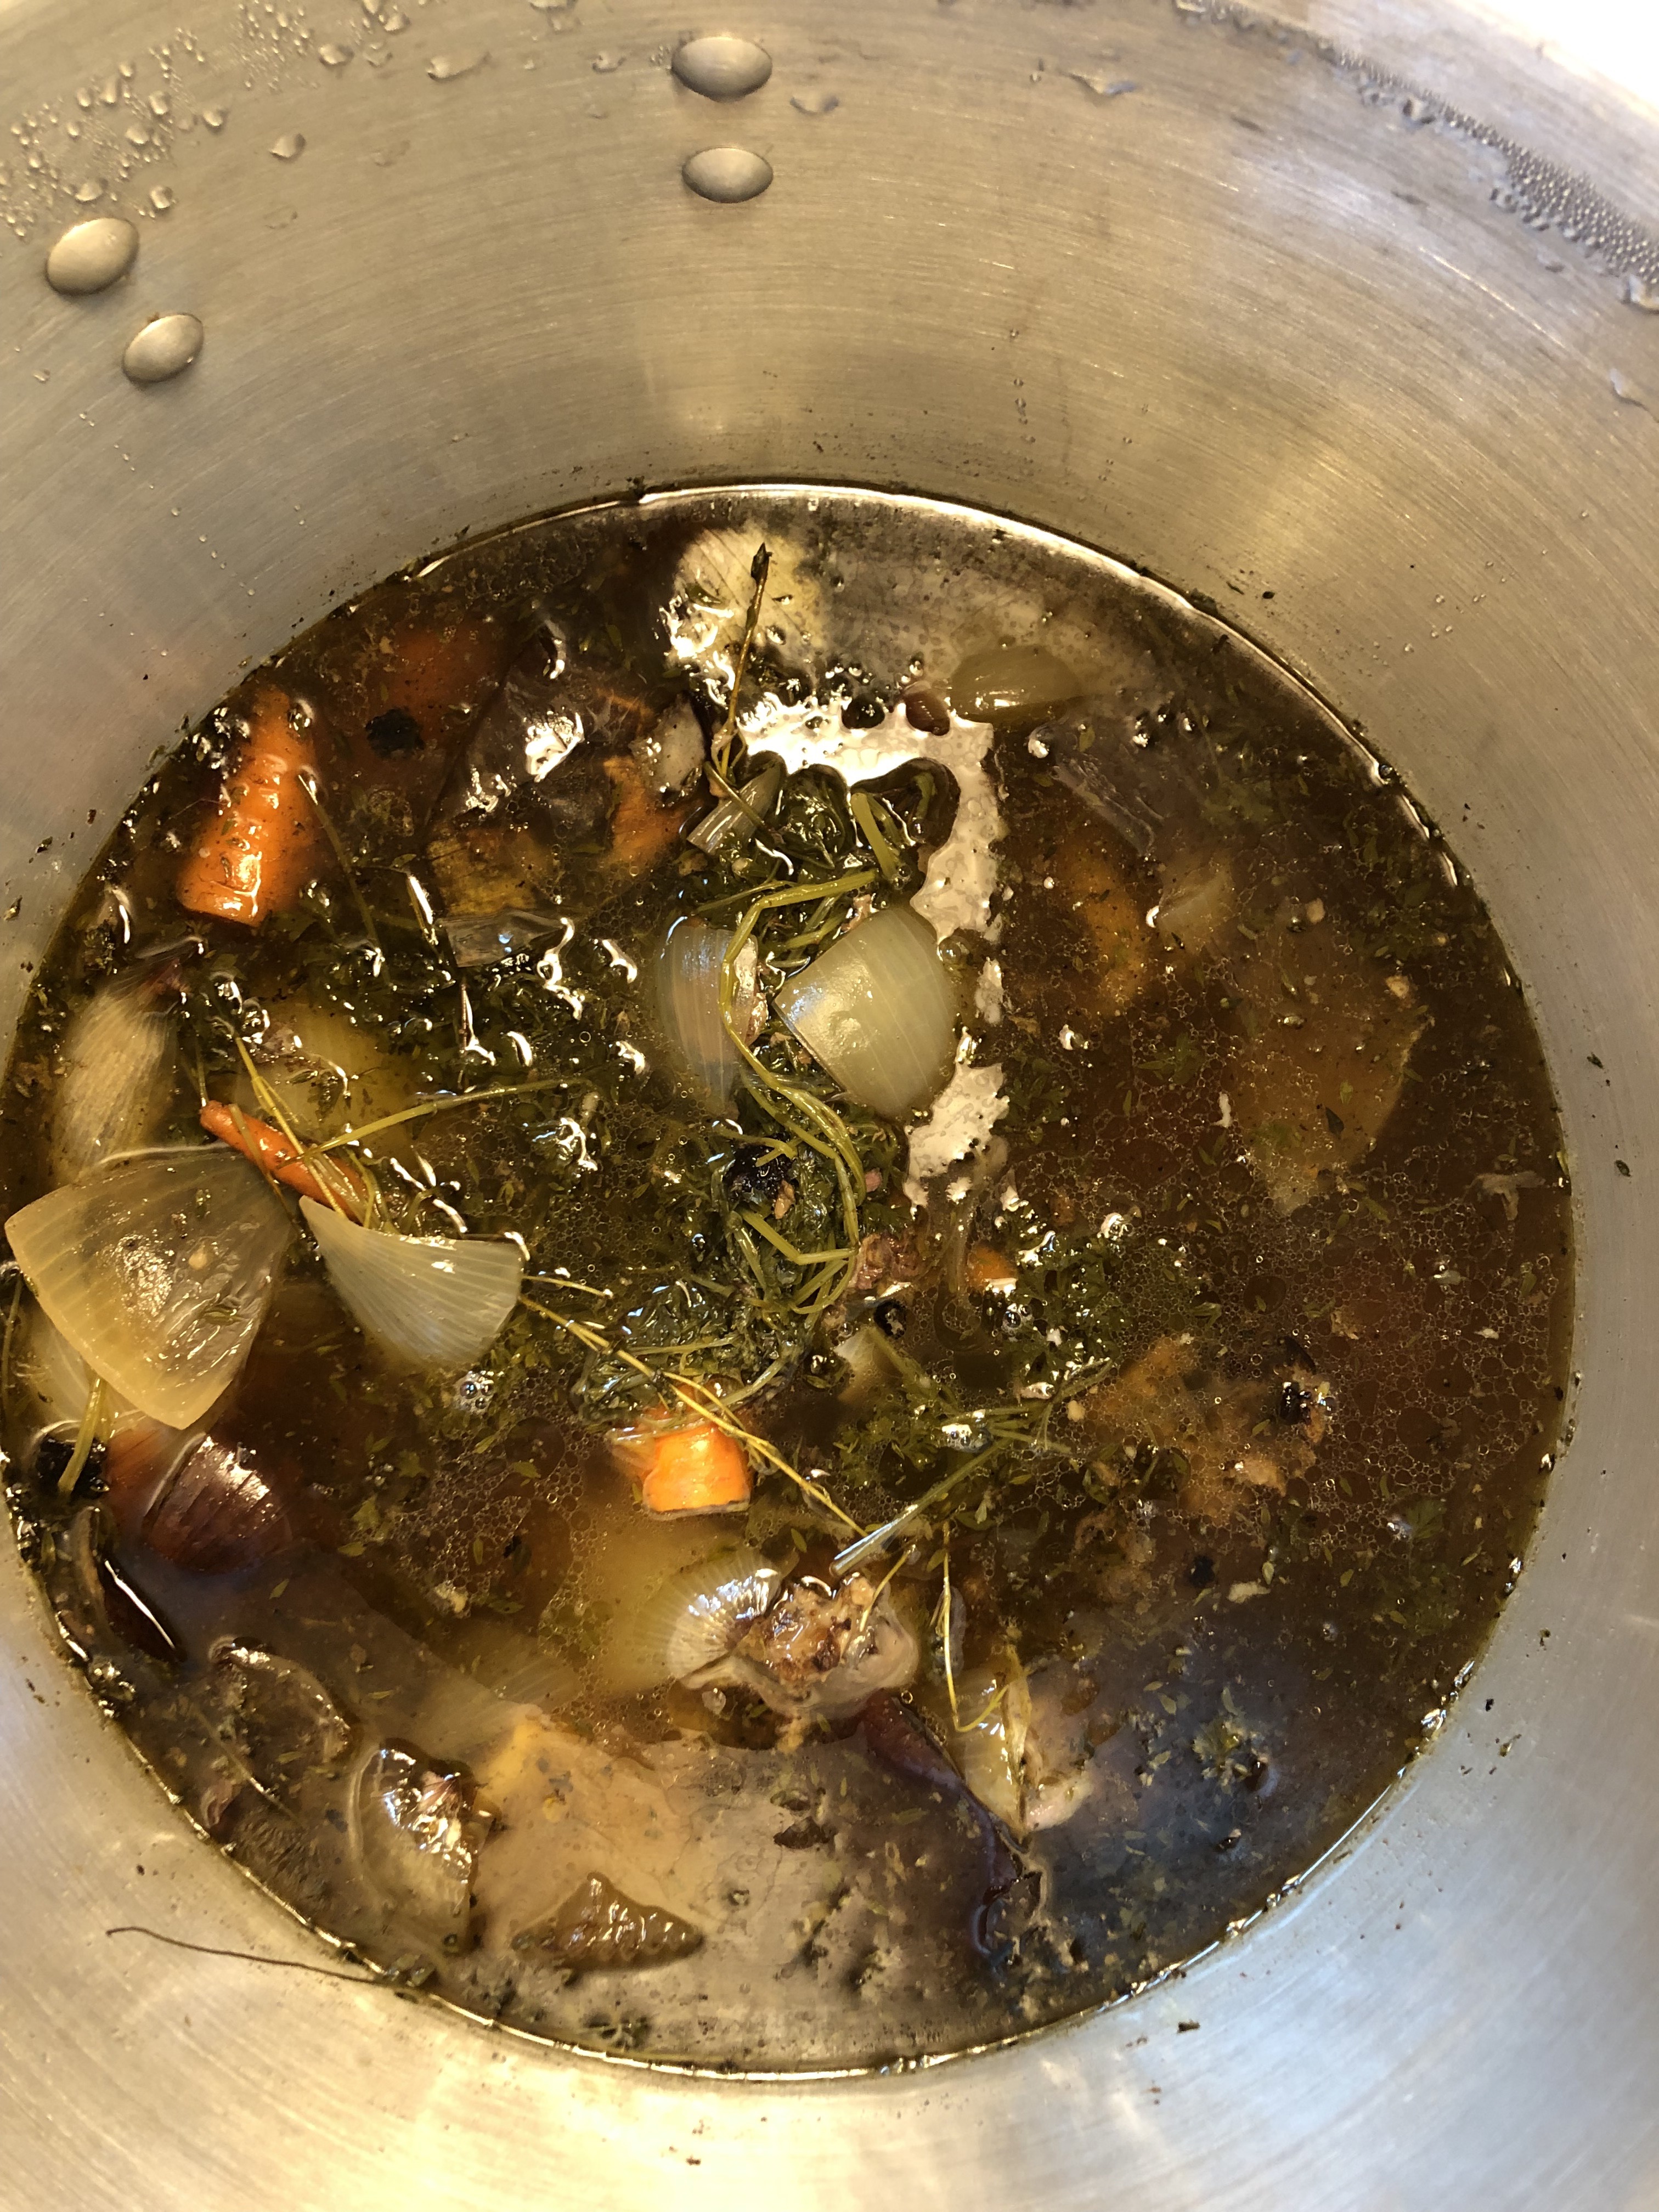
(6) Its “everybody in the pool.” Add your veggies along with the remaining drippings, and bones to the stock pot. What veggies? I thought you’d never ask:
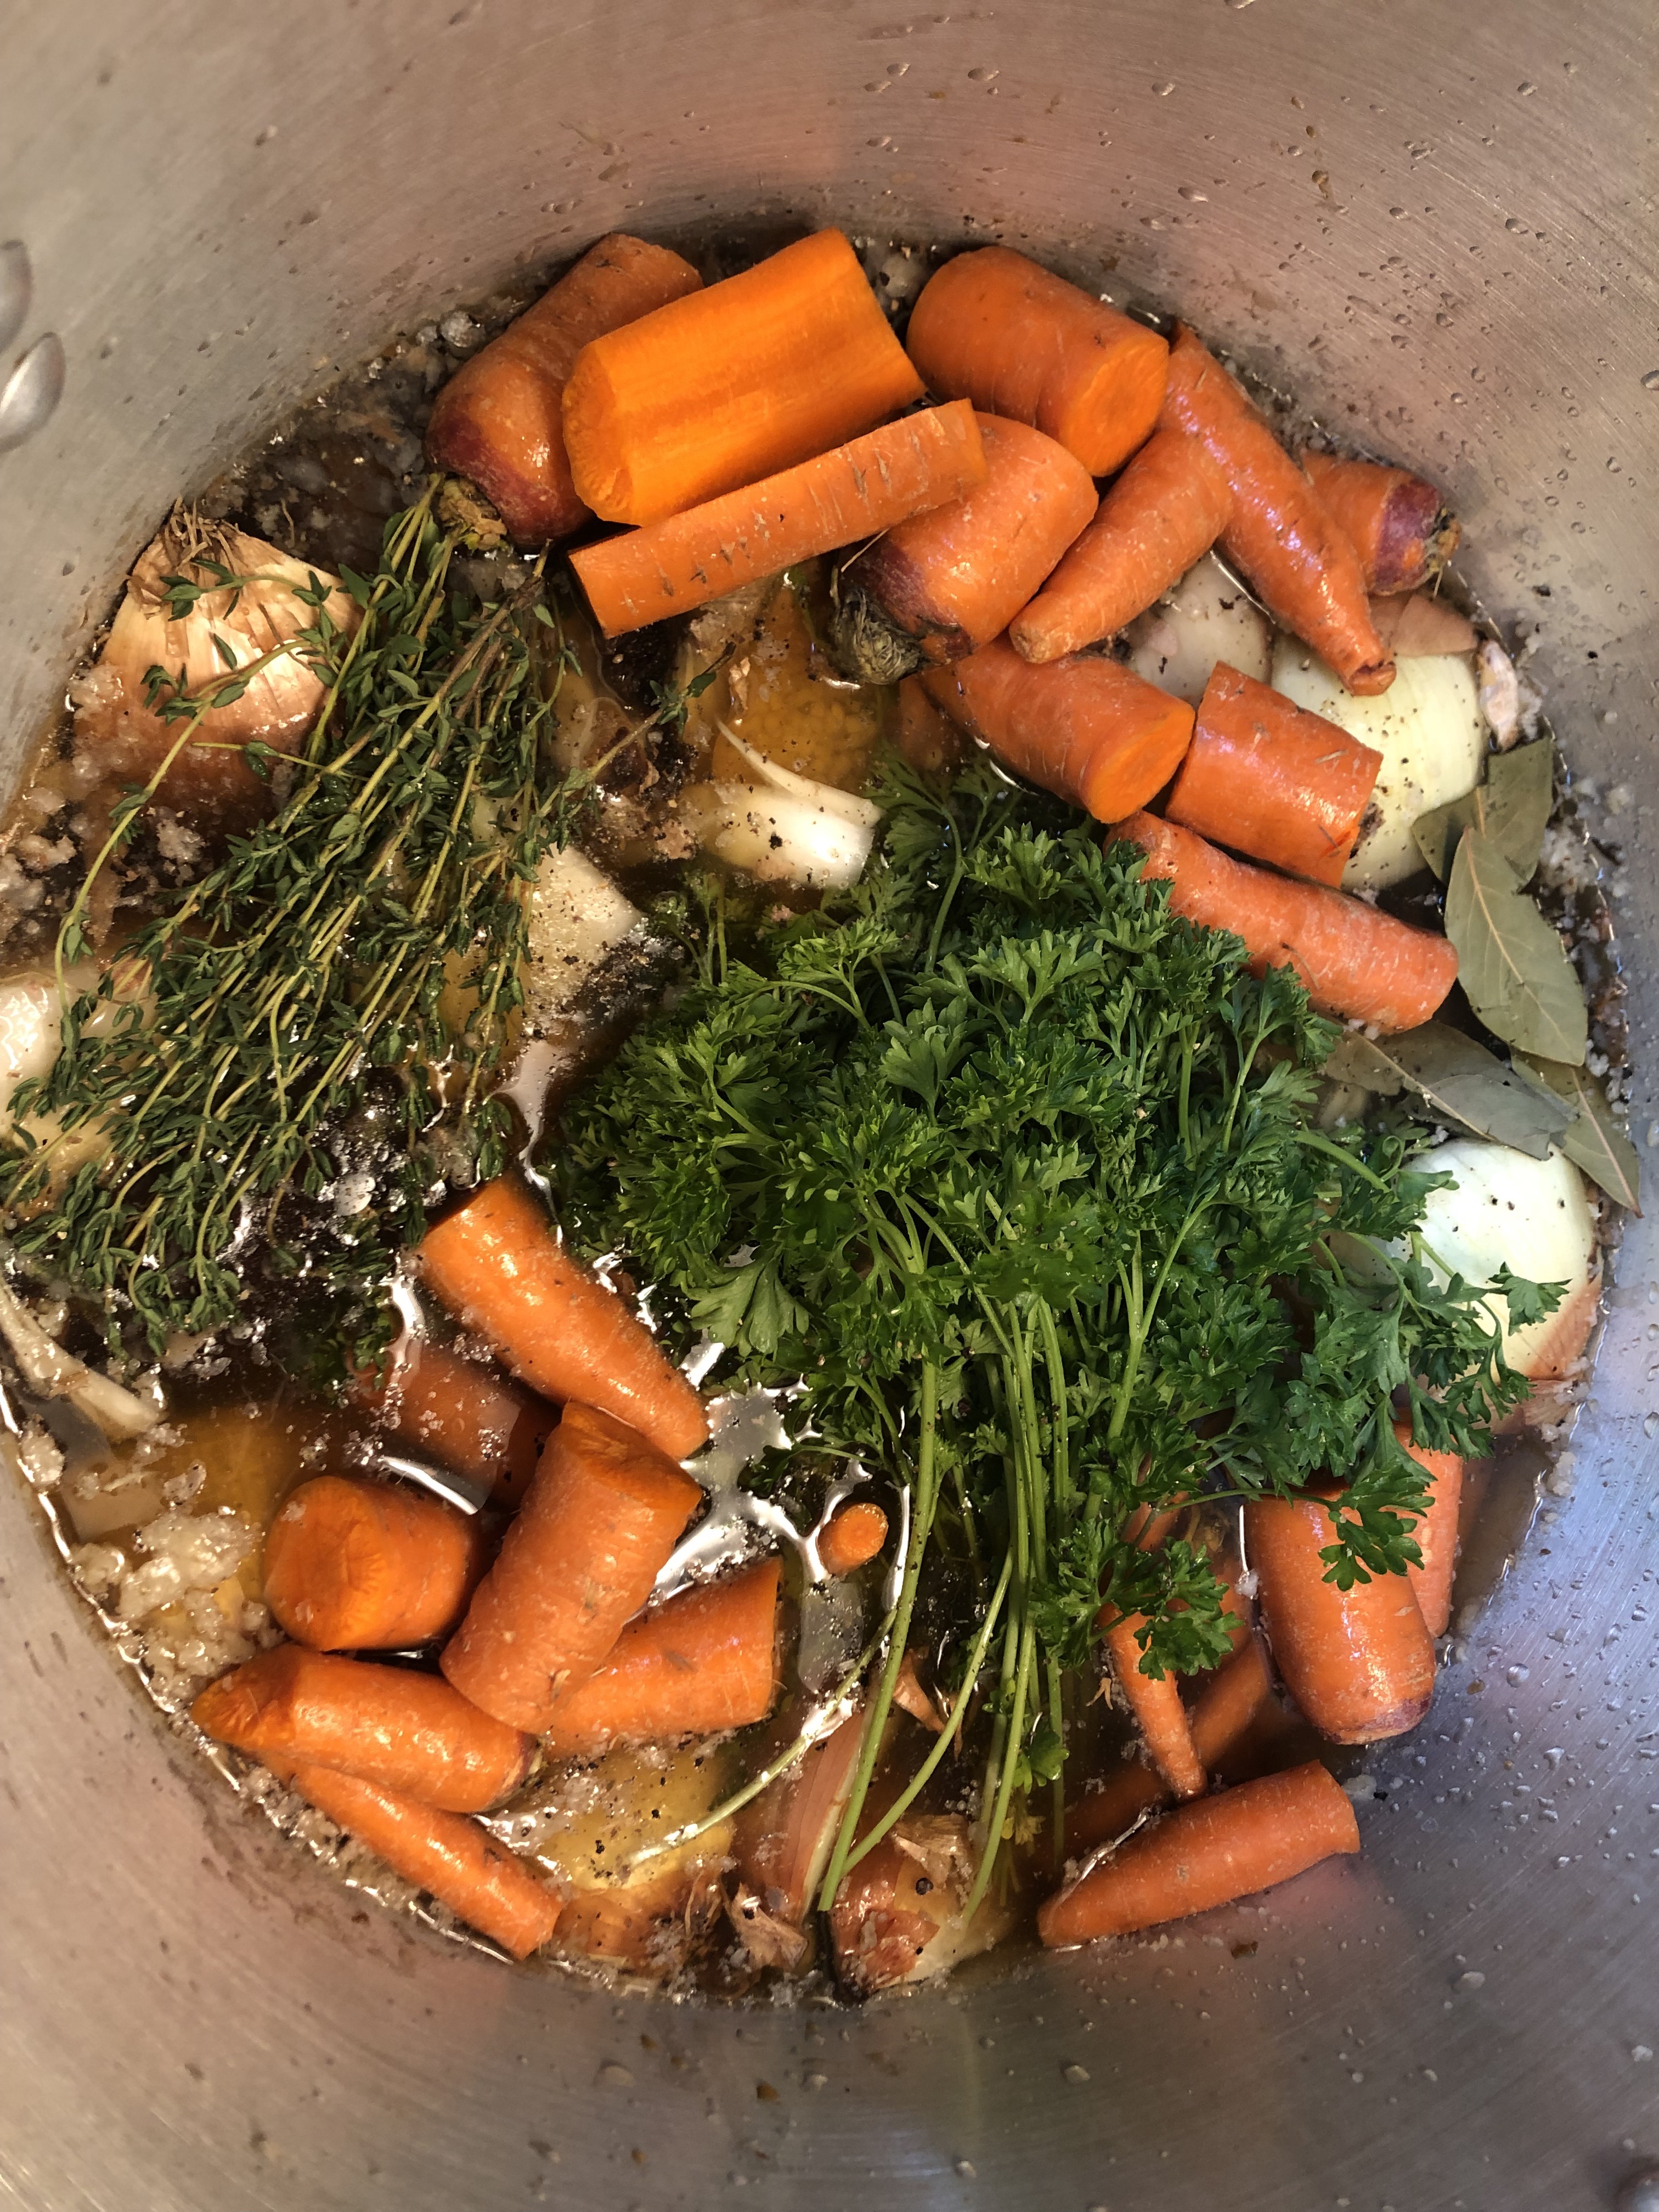
- Carrots
- Celery
- Parsnip (I didn’t use these b/c I didn’t grow any in my garden)
- Whole Onion (with skin which will the broth flavor and depth of color)
- Fresh Parsley
- Fresh Thyme
- Whole Garlic Cloves (with the skin)
- Whole Black Pepper Corn
- Bay Leaves
Leave the skin on the onion and garlic, as well as the carrot and celery tops because we will be separating this out later anyway, and it imparts great color, and flavor into the broth.
(7) Add about 2 tablespoons of apple cider (or white if that’s all you have) of vinegar. This will help to break down the bone and extract calcium, and other nutrients from the bones.
(8) Add enough water to cover the bones. You will be reducing this down as the broth extracts all of the goodies from your bone & veggie mix.
(9) Get the pot up to a low boil, then reduce heat down to a simmer. Simmer the contents partially covered for 4 to 8 hours. I usually set mine up, and cook at a low simmer over night, checking early in the morning.
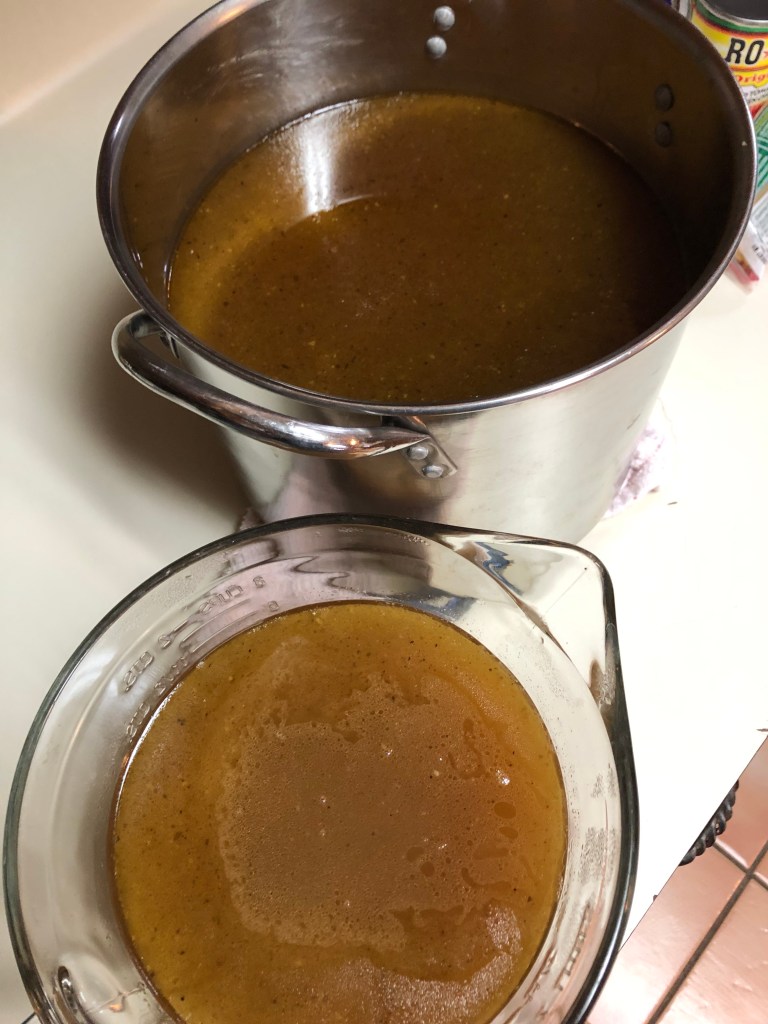
(10) Once reduced, I ladle the contents through a colander sitting in a fine mesh sieve sitting in a pot used to catch the strained liquid. Many people further strain the mixture through a paper towel, but I’m good with mine having a small amount of sediment in it.
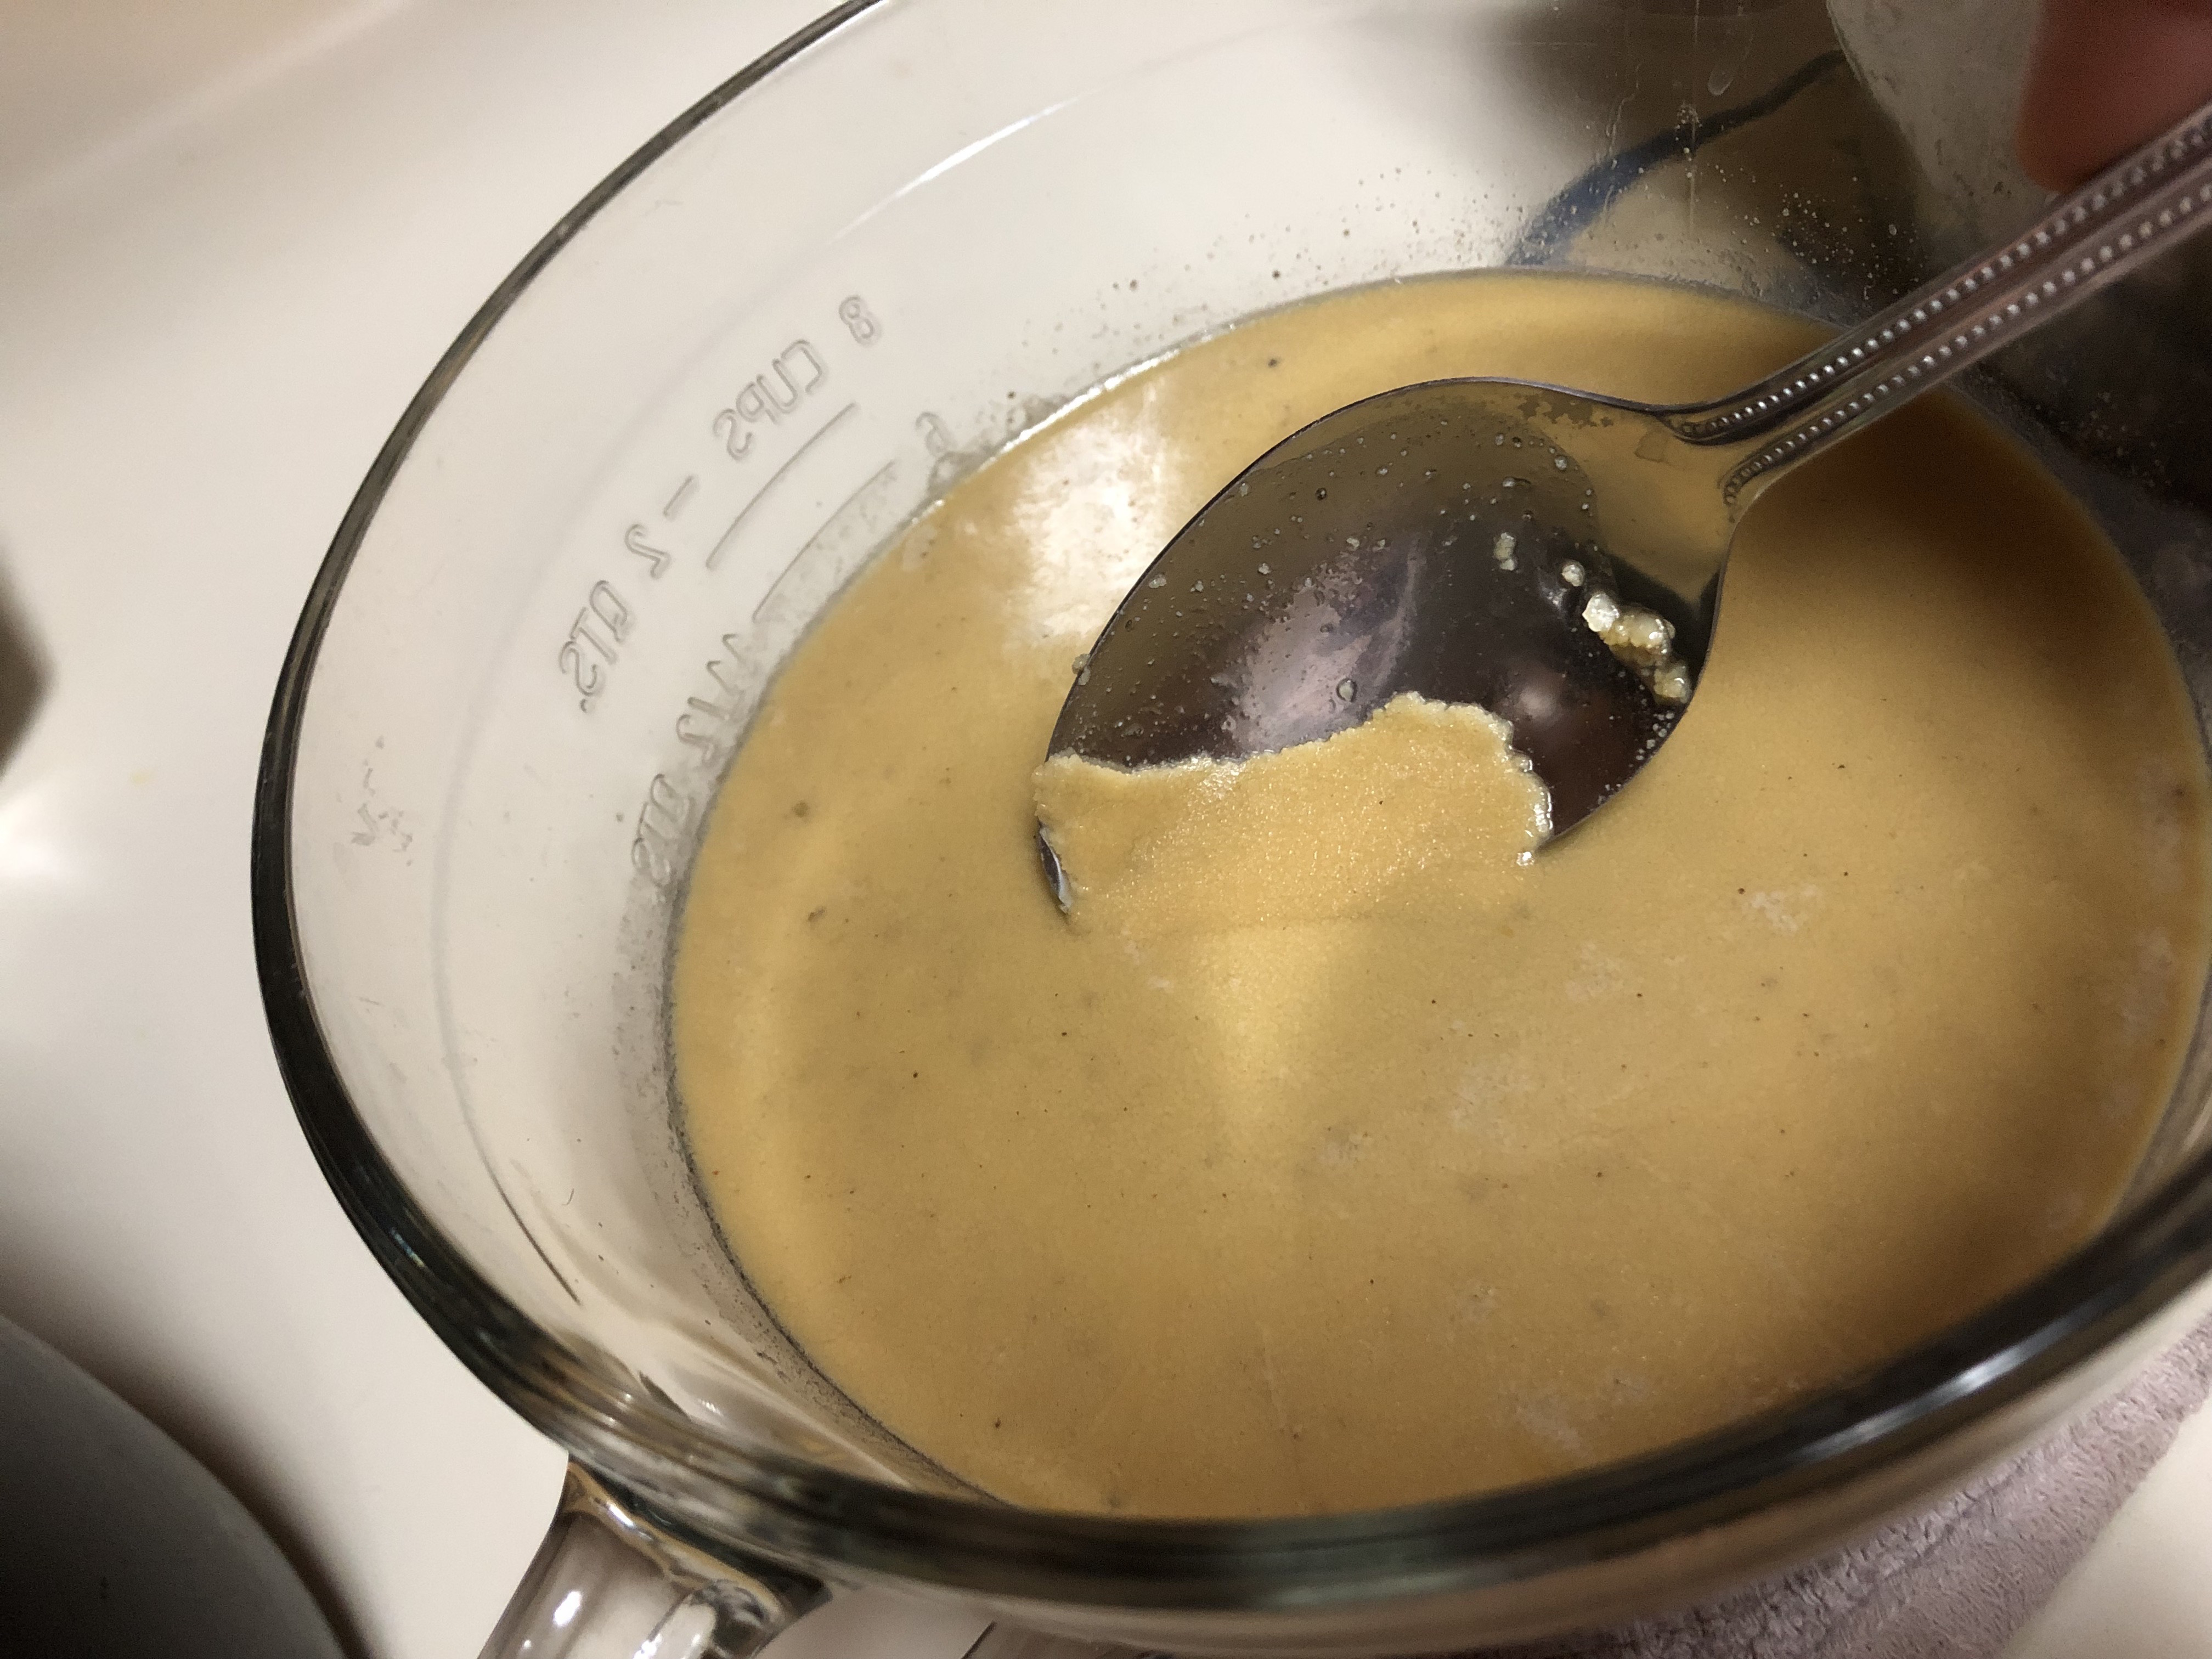
(11) Add salt to taste. You don’t want to salt until this point because it is easy to get it too salty when you are reducing it down because the moisture in the pot will escape, but the salt is left behind. Now is the time to adjust the salt content.
(12) Allow the broth to cool in the fridge, then scrape away the layer of fat that forms on the top of the liquid. The broth will be the darker layer below the lighter colored fat, and should have a gelatinous look to it.
(13) Put in freezer safe jars, and place in the freezer with the lid placed on the top but now screwed down all the way. Make sure to leave about 1-1.5″ of head space in the jar to allow for expansion so you don’t end up making a bone broth bomb in your freezer. Once frozen, you can come back and tighten the jar lids.
(14) Simply remove a jar and allow to thaw when cooking a meal. You will enjoy its richness, health benefits, and the fact that you can adjust the flavors, and sodium to your taste and lifestyle.
He>i
What I like most about this broth is that I get to decide what is in it. I know exactly what I’m feeding my family. I can adjust the sodium level to as great or little as desired. I can make certain that the ingredients come from a reputable place (like my garden, or from a wild grazing animal that I harvested). Not to mention it allows me to respect the animal that gave it’s life to feed me by using as much of it as possible…Plus, it tastes pretty freaking amazing.

Leave a comment