Making a “Bow Press”:
What I’m about to explain to you will get you laughed out of every bow shop in the country (but not before they charge you for each chuckle). I rigged up my own sad little rendition of a bow press, because I’m too cheap to pay somebody to do it. I’m also too cheap to buy a bow press because I don’t even shoot compounds (I shoot recurves and longbows which do not require a press to work on). However, my daughter will be shooting a compound this year, so I need to get her rigged up for bow season. Be advised that there is quite a bit of risk involved in using this method, so do it at your own risk.
Method #1:
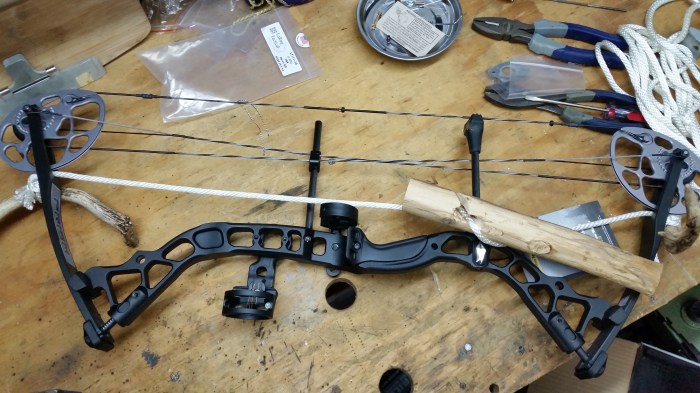
I tied a very sturdy rope to two pieces of deer antler. Wood would work but I just had these laying around in my shop. After slipping the rope through a hole in a piece of scrap cedar I also had in the shop. Again, any solid piece of material would work here too.
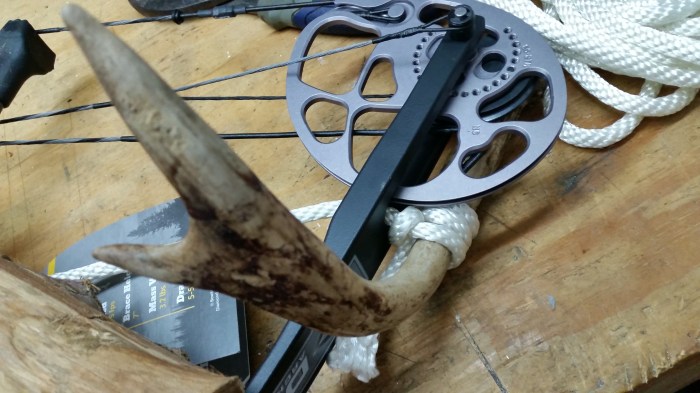
Note that the rope goes through the split in the limb
Next I twisted the cedar until it put tension on the rope, and pulled the limbs closer together. Once I the rope was tight enough to begin loosening the string only slightly, I zip-tied the cedar to the rope to secure it.


Next I tied two loops of rope to each limb, and attached a ratchet strap. Make sure that wherever you tie this on your bow, it CAN NOT slip of the ends! Tighten the ratchet, and check for the lack of tension in the string (enough to install the peep sight).


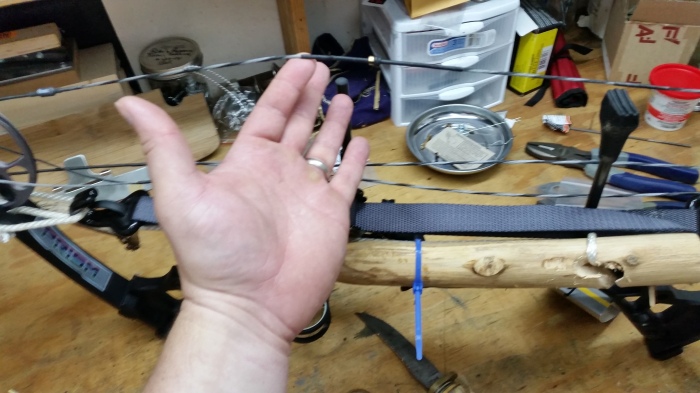
High Tech Redneck! Man, my hand needs to lose some weight! Now I’ll never be a teen model!
At this point you can remove the zip-tie, and twist the rope until it is nearly as tight as the ratchet strap. Then re-zip tie things in place as before.
Once you are done working on your bow, you will carefully let down the ratchet strap. This is why we went through the trouble of doing the rope, because the ratchet strap either holds tension, or it doesn’t. There is no “letting it down easy,” so in this case the tension on the rope will keep the limbs from slamming open and cracking. After you relieve the tension from the ratchet strap, you can cut the zip-tie, and carefully unravel the cedar dowel. During this entire process, you must make absolutely certain that all of the tension cables, cams, string, and everything are in their proper place and in proper alignment or you will be in a real bind when you restore tension to the bow.


Method #2:
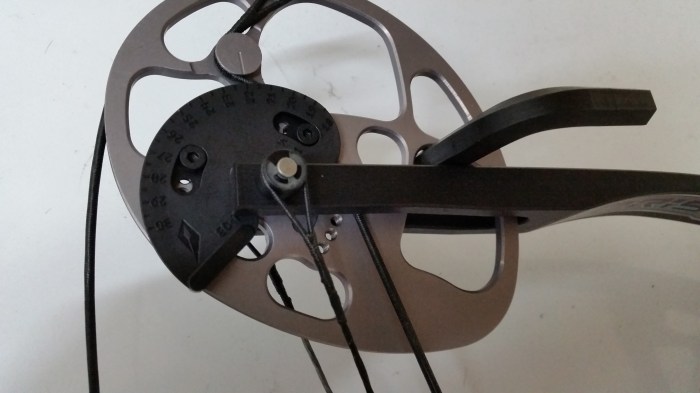
Method #2 takes pressure off of the string, but you would not be able to do any work on the rest of the cam, etc.
You can have someone draw the bow back slightly, and find one of the holes in the Cam to insert a large Allen Key. Then carefully, and slowly have them let down until the Allen Key is resting between the portion of the limb facing away from the shooter, and the Cam, thus halting it’s travel, and leaving the string loose.
The best part about this method is when you are done working on the bow, you simply draw the bow slightly, and turn it on its side to let the Allen Key fall away, then you are good to go.

Make sure that the string is properly aligned prior to putting tension back on the string.
I chose Method #1 when working on my daughter’s bow, because I didn’t have anyone around to draw the bow, or help insert anything. Also, note that Method #2 will not work if you want to adjust the draw length (aka draw stop), so you will need to use Method #1, or use a “grown-up’s” bow press.
I know that this seems like the junkyard way of doing things, but all that you are doing with Method #1 is mimicking the same force in the same location as a commercial bow press. In addition, I know guys who have worked in archery pro shops who have used Method #2 in a pinch to work on their own bows in the field (that is how I learned it).
There is also a cheap alternative that does not risk bodily harm or destruction of property, called a Bowmaster Portable Bow Press. They are about $40, and if I continue to do all of the work on my daughter’s (and hopefully other kids’) bows in the future, I’m going to have to break down and get one.
Again, use Method #1 or Method #2 at your own risk. Note that working on your bow with this method can void the warranty on your bow. Most manufacturers have certain bow presses that they approve or it will void your warranty, so this is definitely something to consider if you are concerned with that.
Categories: archery, bowhunting, diy, hunting, Shooting

Leave a comment