One 72″ piece of angle iron is exactly enough to make one target stand for your USPSA practice targets. These can be used at home in your dry fire practice routine, on the range during live fire, at a match that you are hosting, or all of the above. They are cheap, easy to make, don’t require a lot of skill, tools, and you can get all the materials at the local hardware store.

You don’t have to be a skilled welder, or metal worker to put one of these together, and they don’t have to look pretty. They just have to be able to stand up relatively strait, and stand up to the elements. I practice in Louisiana’s Atchafalaya Basin which is about as rough on metal equipment as conditions can get. So far these stands look like they will last for years with only an occasional touch-up from a spray paint can.
Materials:
- 1 piece of 1 1/2 inch x 1/8 inch x 72 inch Plain Steel Angle. I got mine from Home Depot
- Treated 2×2 lumber for the target sticks.
- Spray paint of your choosing (I find black to be the least distracting)
- Patience.
Tools:
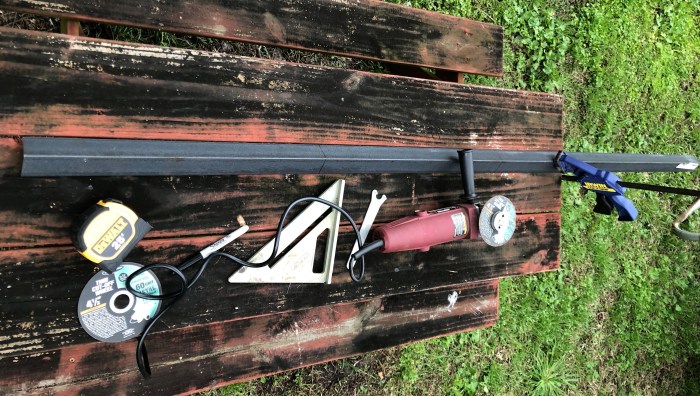
- Angle Grinder w/ a metal cut off wheel, or a metal cutoff saw (a hacksaw would work, but you’re gonna be tired).
- Measuring Tape
- Marker or Pencil
- Welding Machine. I used an $89 flux core welder from Harbor Freight
- Clamps help to hold things while cutting/ welding
Construction:
(1) Take the 72″ piece of angle iron and mark & cut four 4 x 18″ sections.

(2) Take one of the 18″ pieces, and mark the midway point, and make a cut. You should be left with 3 x 18″ piece & 2 x 9″ piece of angle iron.

(3) Using the three 18 inch pieces, lay them out in an “H” pattern, at roughly the half way mark.

(4) Weld that bad boy!

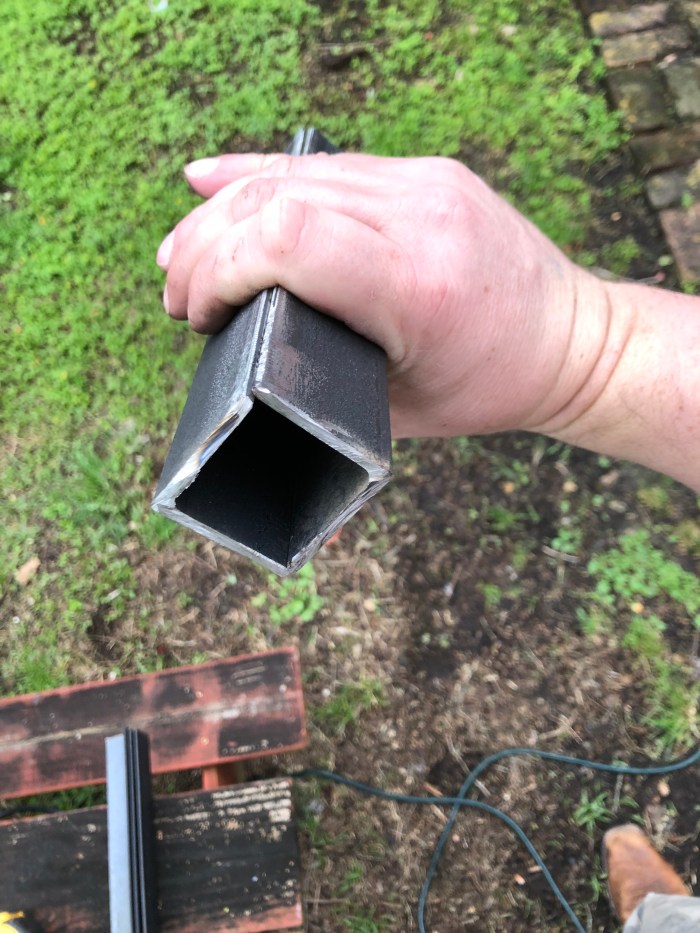
(5) Next, take your two 9 inch pieces, and hold them together to make a piece of square tubing just the right size to fit the wooden 2X2 target legs that will hold up your target.
I used tape (I know it might contaminate my weld, sue me) to hold the two pieces together while welding the ends. After I had the piece held together with the welds on both ends, I welded the center.
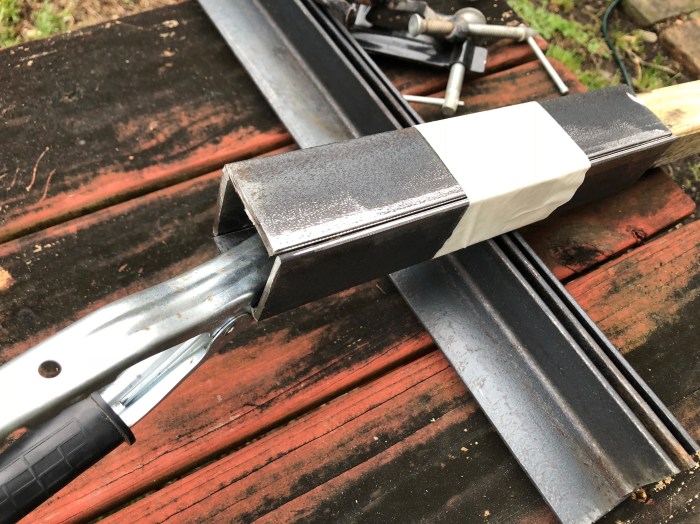
Notice that I have one of the wooden target legs inserted into one end to ensure that they will fit once welded.

The welded ends. A welder I am not, so please don’t judge!

All welded up.
(6) After this piece cools, then you will mark the center point (should be around the 4.5″ mark if you did all of your other cuts strait). Make a cut, and you should end up with two roughly 4.5″ long square tubing pieces. These are the pieces that your 2 x 2’s will slip into.
(7) Place the tubing pieces on the legs of the “H” shaped stand, and weld them in place. Do your best to keep them sitting strait up and down so that your stand legs aren’t sticking in crazy directions. If this happens, it isn’t a big deal, because you will be stapling them strait with the cardboard targets, but it looks funky and if it’s too bad, you wont’ be able to staple the 18″ wide competition targets to the sticks.

(8) Let everything cool, brush as much slag, and flux off of the metal as you can (if using flux core welder). Let it cool, and spray paint with whatever color float’s your boat.

Blaa-Kaw! USPSA Target Stand for $16.99 (+tax)
These metal stands are tough enough to stand up to years of punishment and abuse from a goofy fat guy throwing lead, as well as the moist, harsh environment in which they will be sitting. And for a few bucks apiece, if they break, get stolen, shot up, etc… Just build another one!
To see how to make USPSA Targets at home cheaper than you can buy them, check out How To Make Cheap USPSA Targets

Check out How To Make Cheap USPSA Targets

Tip I got from a class with a really good shooter: run the stage 4-5 times before taping. This’ll show you trends in what you’re doing. Then try to very the aggression to see how it affects the hits.
LikeLike
I haven’t been able to practice for a while, but when I get cranked back up again I’m def going to try this. Thanks man.
LikeLike